零代码零基础!小红书MCP全自动化运营【保姆级安装教程】
本篇介绍如何通过预编译安装包部署小红书 MCP(xiaohongshu-mcp),完成登录、启动服务、用 MCP Inspector 验证,以及在 Cursor 的 .cursor/mcp.json 中接入 Streamable HTTP,从而用自然语言实现图文/视频发布与互动。文末包含常见连接与路径问题排查与合规使用提示。

一、前言
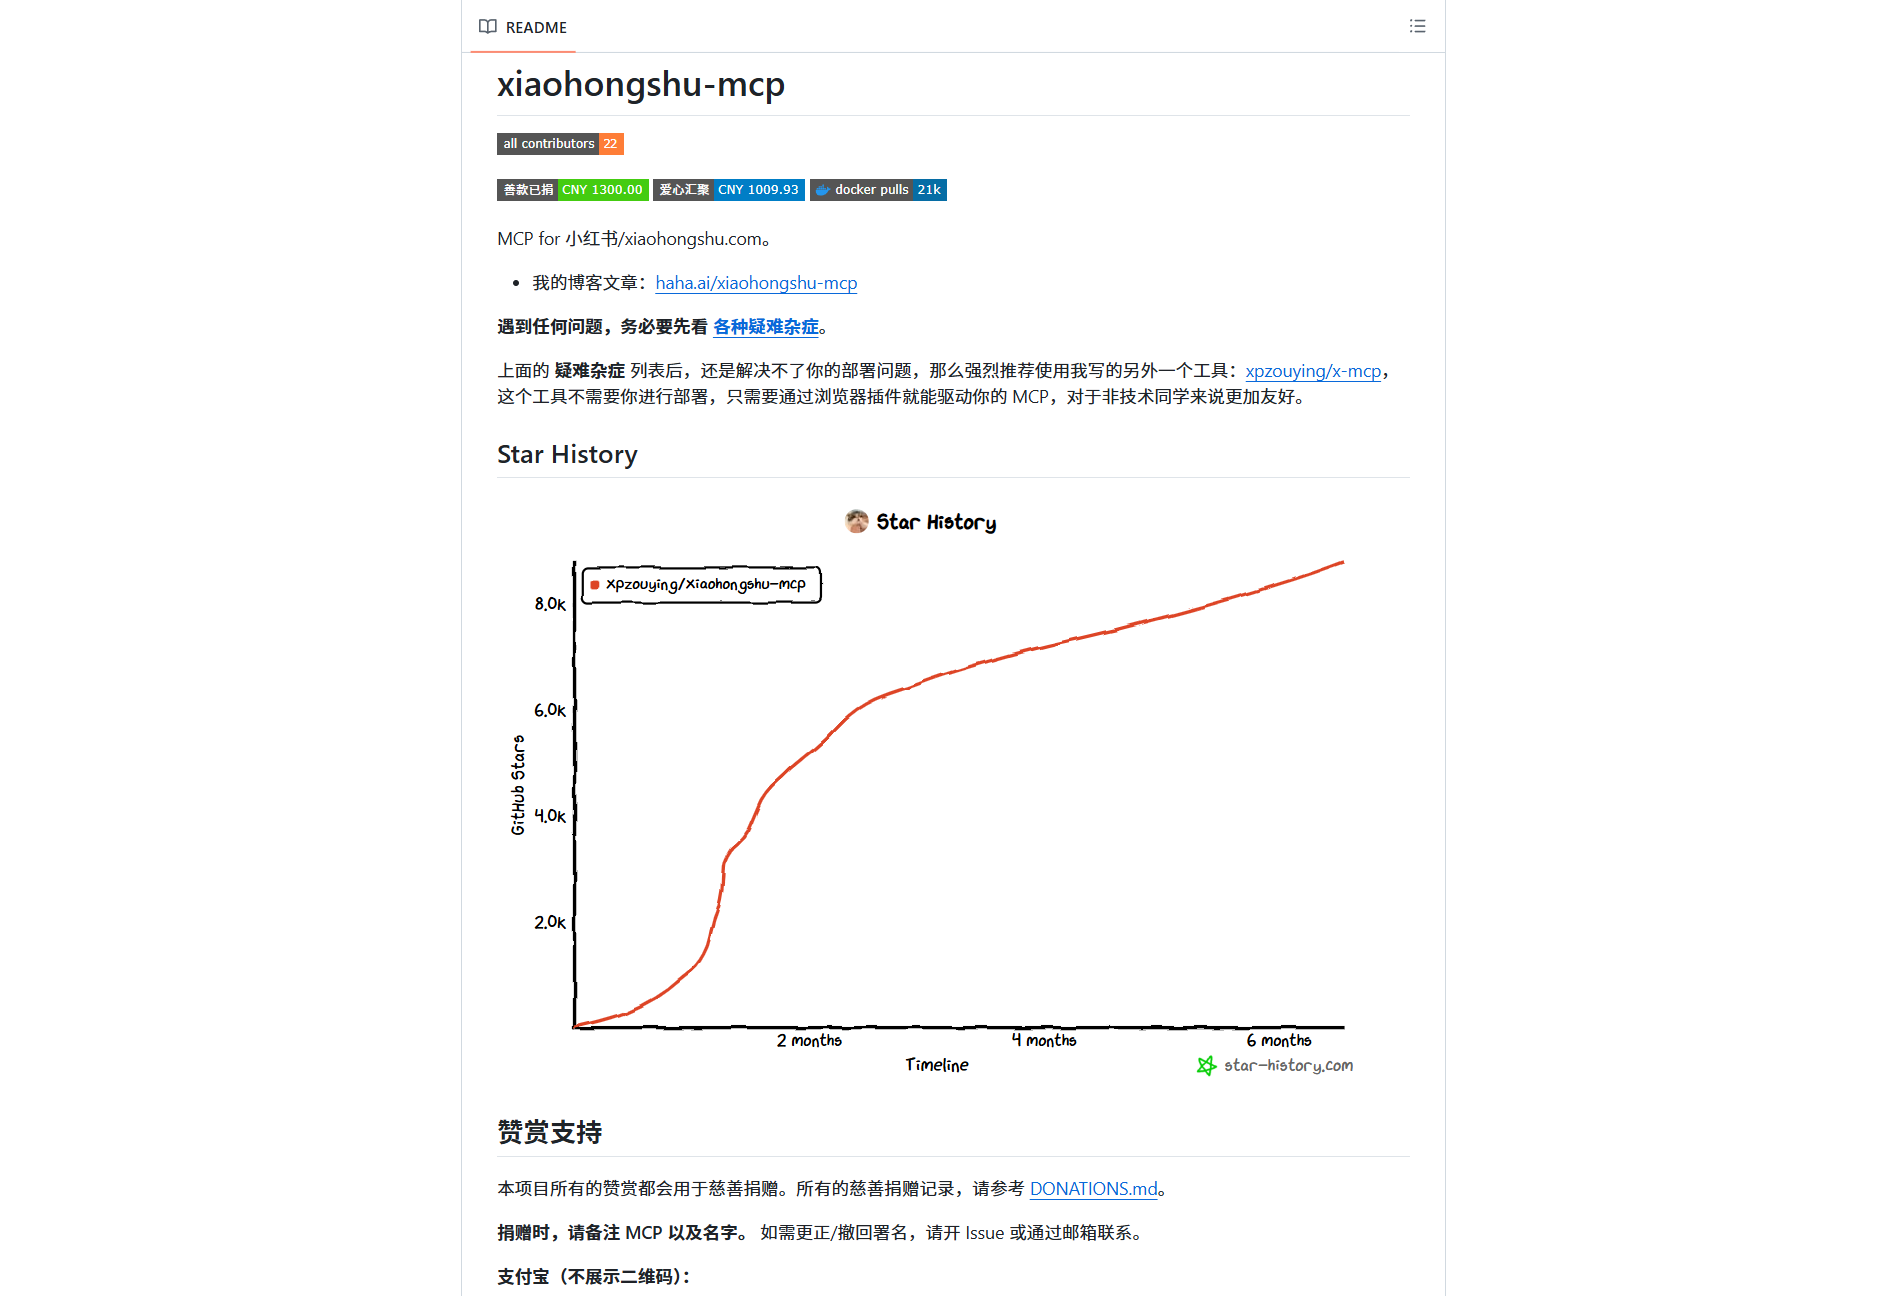
小红书MCP(xiaohongshu-mcp)是一款能实现小红书自动化运营的工具,支持登录验证、图文/视频发布、评论互动、用户信息查询等核心功能。相比源码编译、Docker部署,下载预编译安装包是最快捷的方式,无需配置开发环境,新手也能快速上手。
本文将全程基于「安装包下载」的方式,手把手教你完成小红书MCP的部署、接入Cursor编辑器,并演示核心功能的使用,让你轻松实现小红书内容的自动化管理。
二、准备工作
2.1 系统环境说明
支持的系统版本(请对应下载):
- macOS:Apple Silicon(arm64)/ Intel(amd64)
- Windows:x64(Windows 10/11 均可)
- Linux:x64
2.2 必装依赖(仅2个,极简)
(1)Node.js(用于MCP连接验证)
无论哪个系统,建议通过官方推荐方式安装Node.js LTS版本,确保环境变量自动配置:
- Windows:打开「管理员命令行」执行
winget install OpenJS.NodeJS.LTS - macOS/Linux:参考 Node.js官方下载页 安装LTS版本
(2)网络环境
首次运行会自动下载无头浏览器(约150MB),需确保网络通畅,后续无需重复下载。
2.3 下载小红书MCP安装包
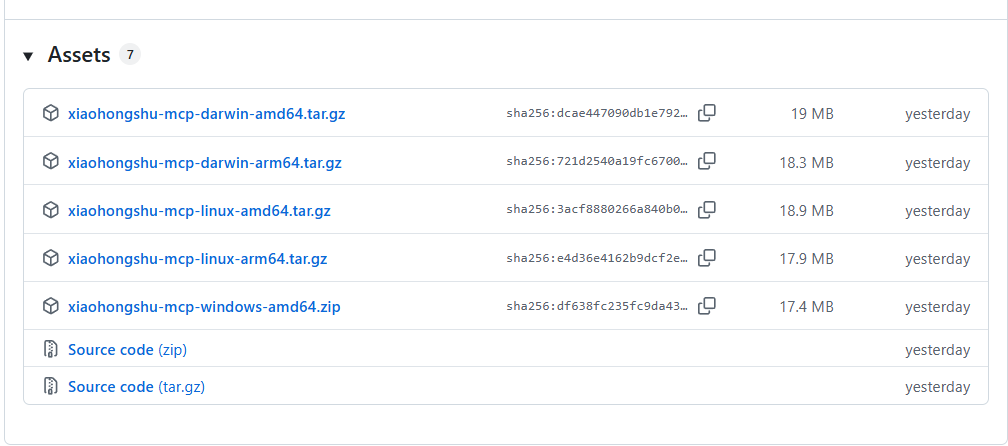
- 打开 xiaohongshu-mcp的GitHub Releases页面
- 根据自己的系统下载对应安装包:
- Windows x64:
xiaohongshu-mcp-windows-amd64.zip - macOS Apple Silicon:
xiaohongshu-mcp-darwin-arm64.zip - macOS Intel:
xiaohongshu-mcp-darwin-amd64.zip - Linux x64:
xiaohongshu-mcp-linux-amd64.zip
- Windows x64:
- 下载完成后,将压缩包解压到任意目录(建议路径不含中文/空格,比如
D:\xiaohongshu-mcp或/Users/你的用户名/xiaohongshu-mcp)。
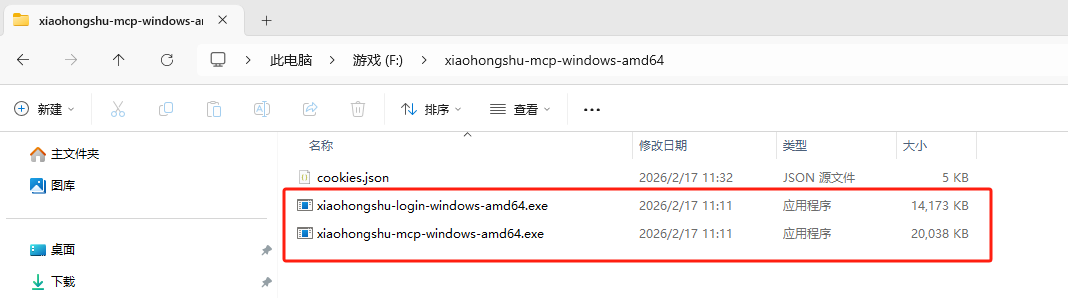
注意cookies.json是登录之后才会有的,刚刚解压完只会有我圈起来的这两个
三、部署小红书MCP服务
3.1 解压安装包并确认文件结构
解压后目录内会包含两个核心文件(以Windows为例):
xiaohongshu-login-windows-amd64.exe:登录工具(必先运行)xiaohongshu-mcp-windows-amd64.exe:MCP主服务程序
其他系统对应文件:macOS是
xiaohongshu-login-darwin-arm64/xiaohongshu-mcp-darwin-arm64,Linux是xiaohongshu-login-linux-amd64/xiaohongshu-mcp-linux-amd64。
3.2 运行登录工具完成小红书认证
这是核心步骤,MCP服务依赖登录后的Cookies才能正常工作:
- 打开终端/命令行,进入解压目录:
- Windows:在解压文件夹空白处右键 → 「在终端中打开」
- macOS/Linux:打开终端,执行
cd /你的解压路径/xiaohongshu-mcp
- 运行登录工具:
- Windows:
./xiaohongshu-login-windows-amd64.exe - macOS/Linux:
chmod +x xiaohongshu-login-darwin-arm64  # 赋予执行权限(仅首次)
./xiaohongshu-login-darwin-arm64
- Windows:
- 登录流程:
- 运行后会自动下载无头浏览器(耐心等待);
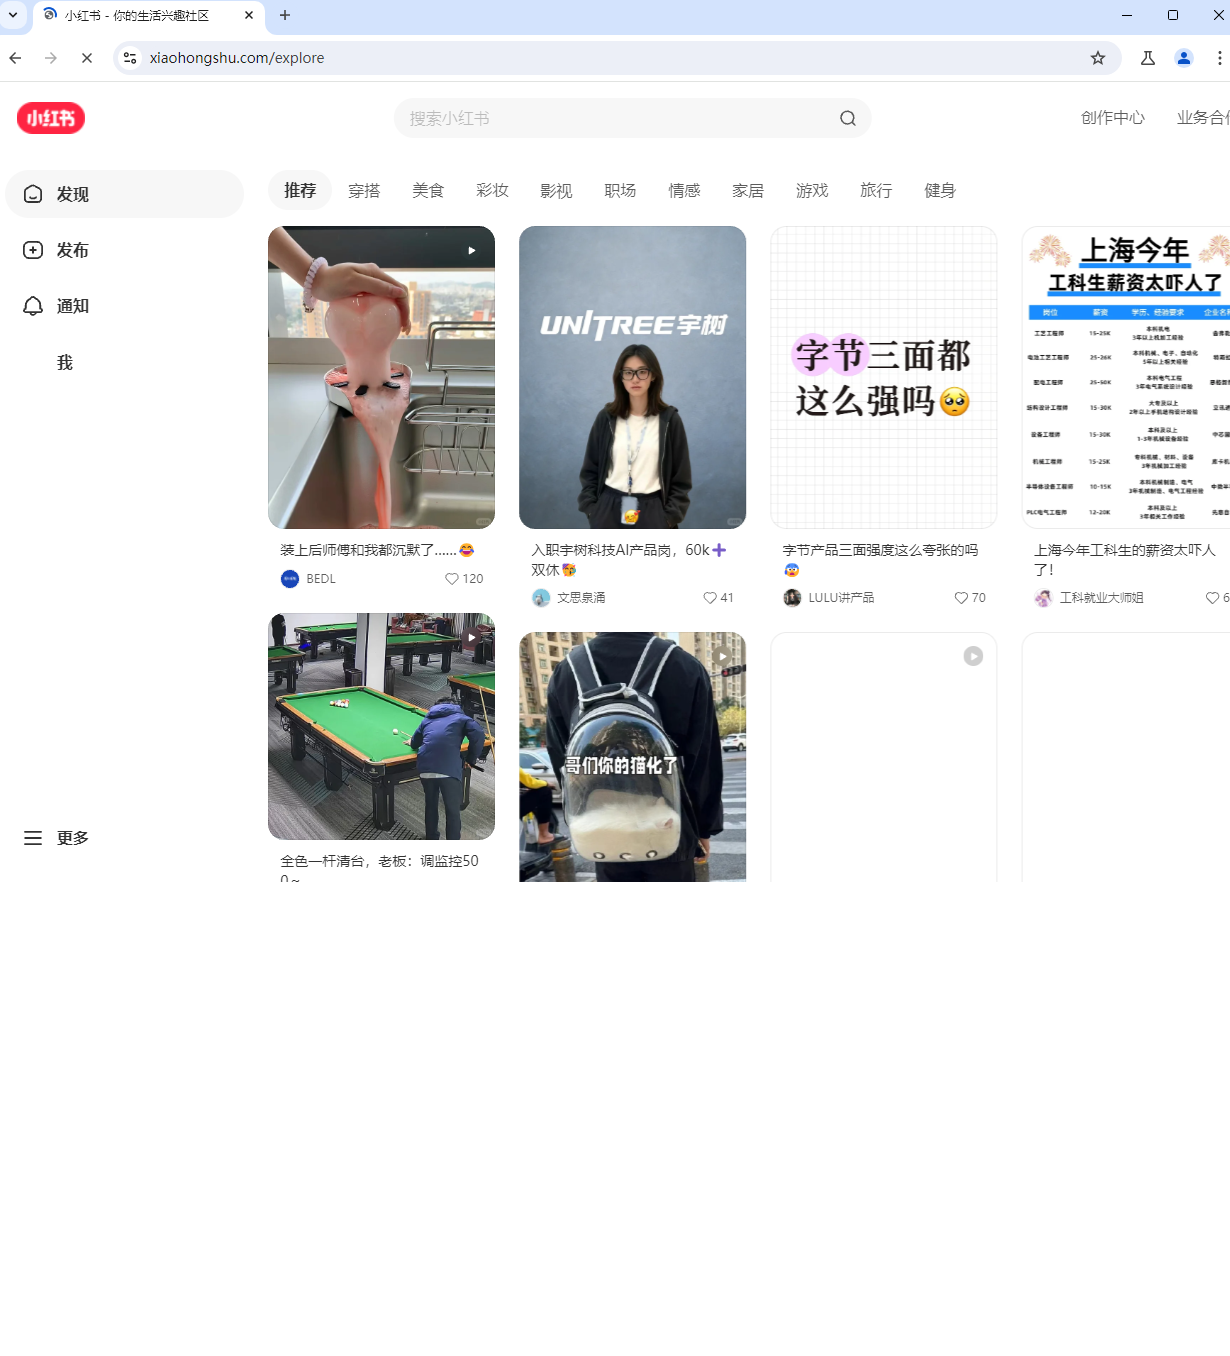
- 弹出小红书登录页面(扫码/手机号登录均可);
- 登录成功后,终端会提示「登录成功」,并自动生成
cookies.json文件(保存在当前目录,切勿删除)。
⚠️ 重要提醒:小红书账号不允许多网页端登录,登录MCP后,不要在其他浏览器登录同一账号,否则会被踢下线(手机App登录不受影响)。
3.3 启动MCP主服务
登录成功后,继续在终端执行以下命令启动MCP服务:
- Windows:
# 无头模式(无浏览器界面,推荐生产使用) ./xiaohongshu-mcp-windows-amd64.exe # 非无头模式(有浏览器界面,调试用) ./xiaohongshu-mcp-windows-amd64.exe -headless=false - macOS/Linux:
chmod +x xiaohongshu-mcp-darwin-arm64  # 赋予执行权限(仅首次)
# 无头模式
./xiaohongshu-mcp-darwin-arm64
# 非无头模式
./xiaohongshu-mcp-darwin-arm64 -headless=false
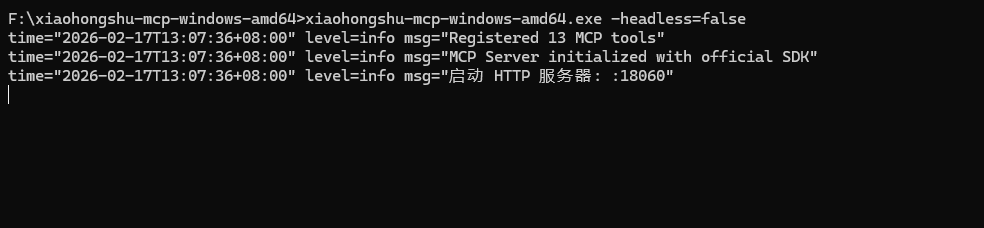
启动成功的标志:终端无报错,且显示「MCP服务启动成功,端口:18060」(默认端口18060,请勿占用)。
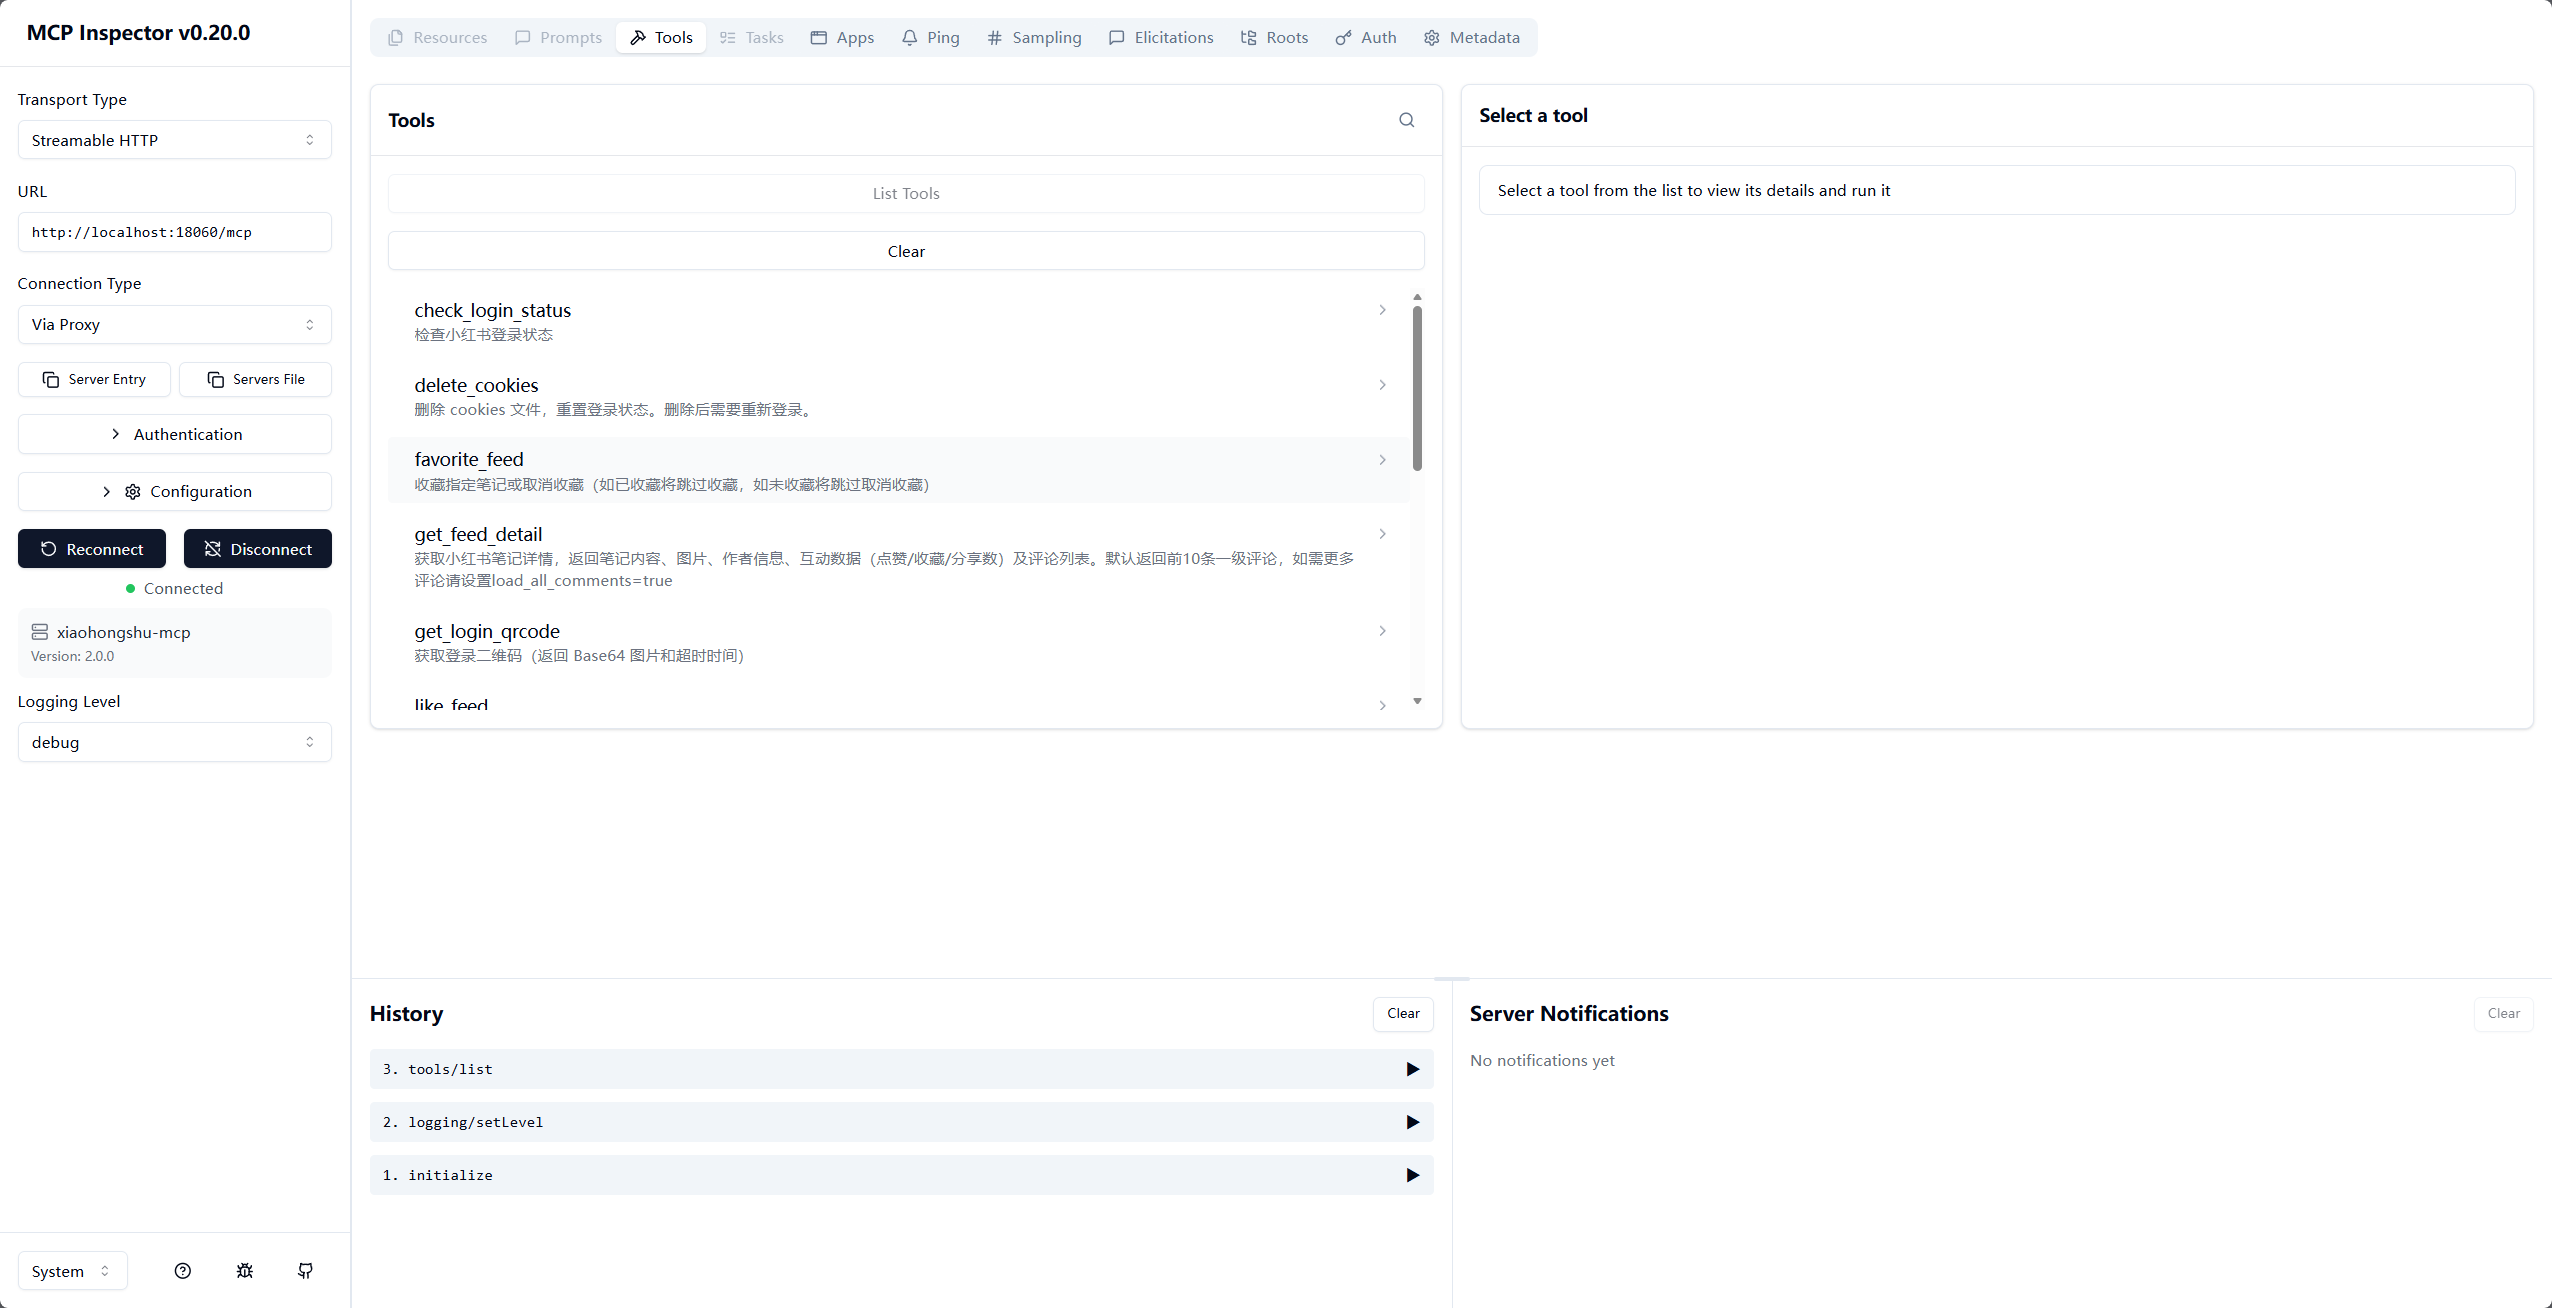
3.4 验证MCP服务是否正常
执行以下命令验证服务可用性:
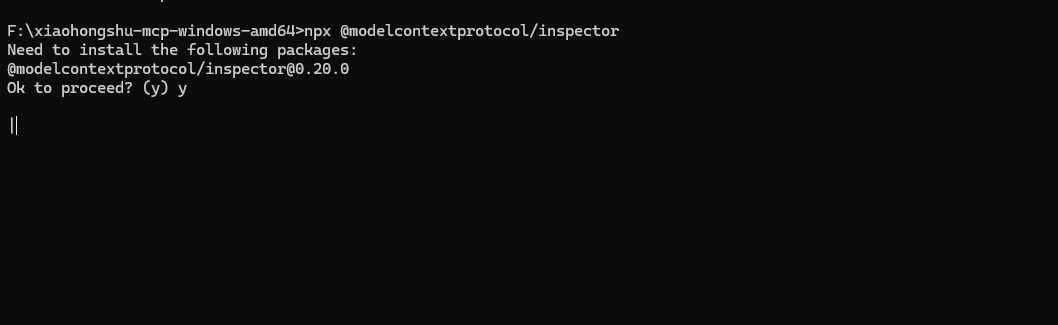
npx @modelcontextprotocol/inspector
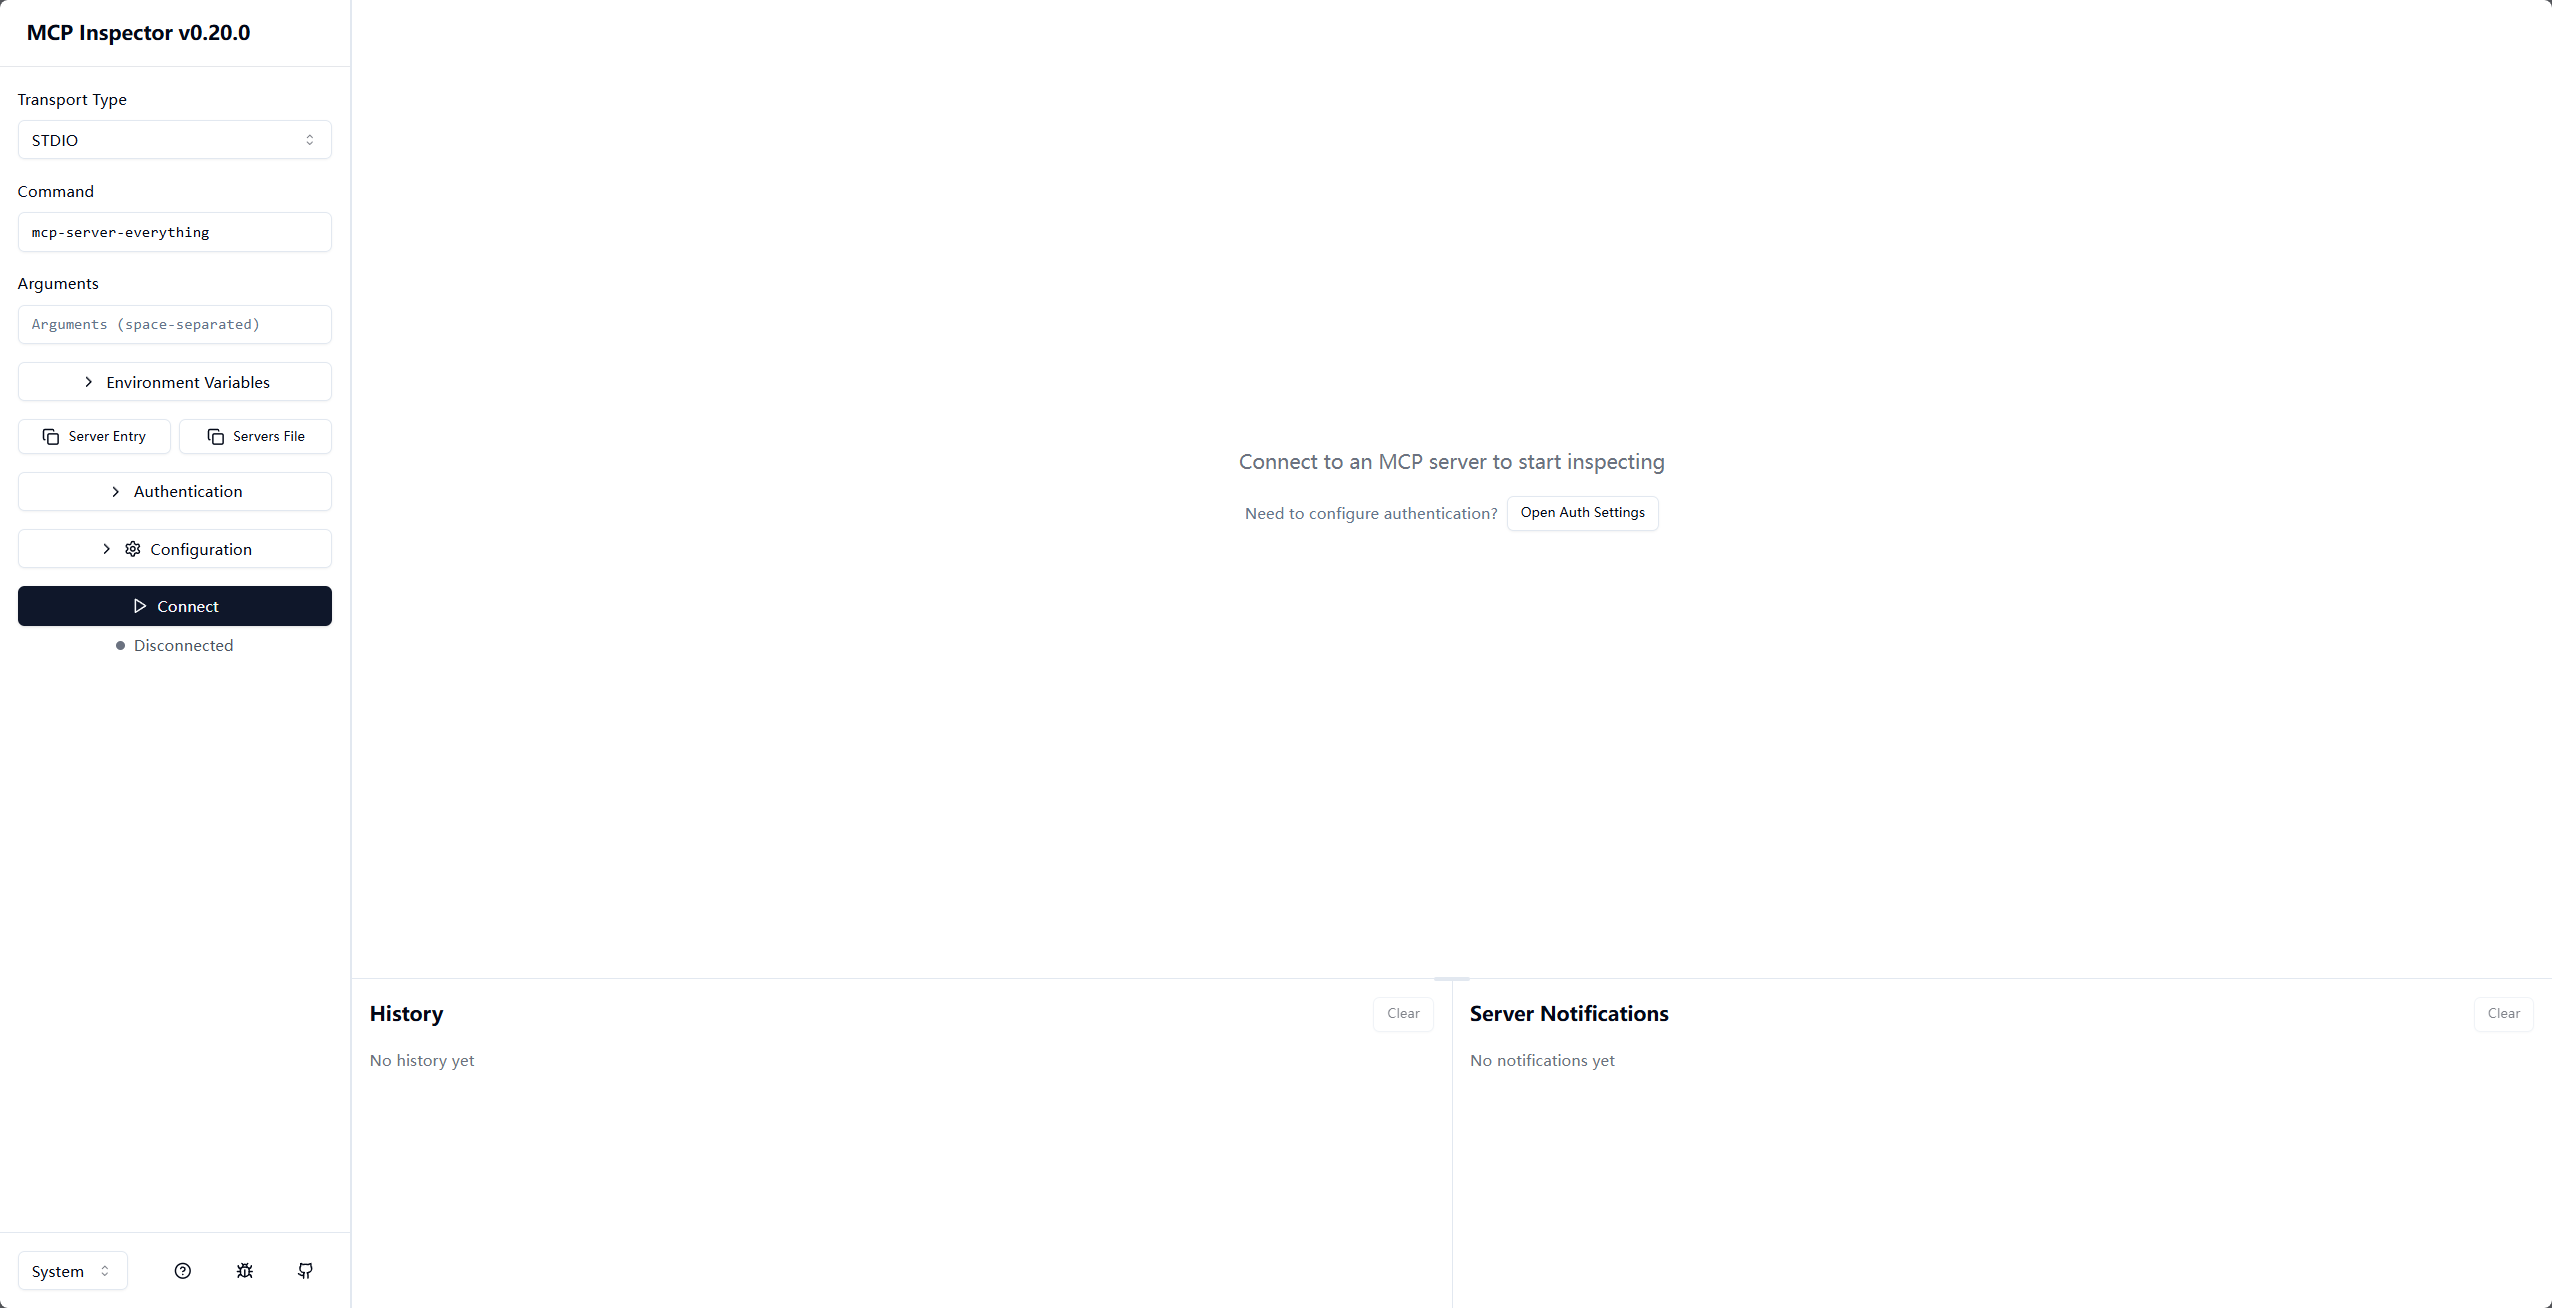
左上角Transport Type下拉框,把STDIO改成Streamable HTTP;
改完后界面会出现URL输入框,把http://localhost:18060/mcp填到这个 URL 框里;
点击左侧的Connect按钮。
成功标志:左下角显示Connected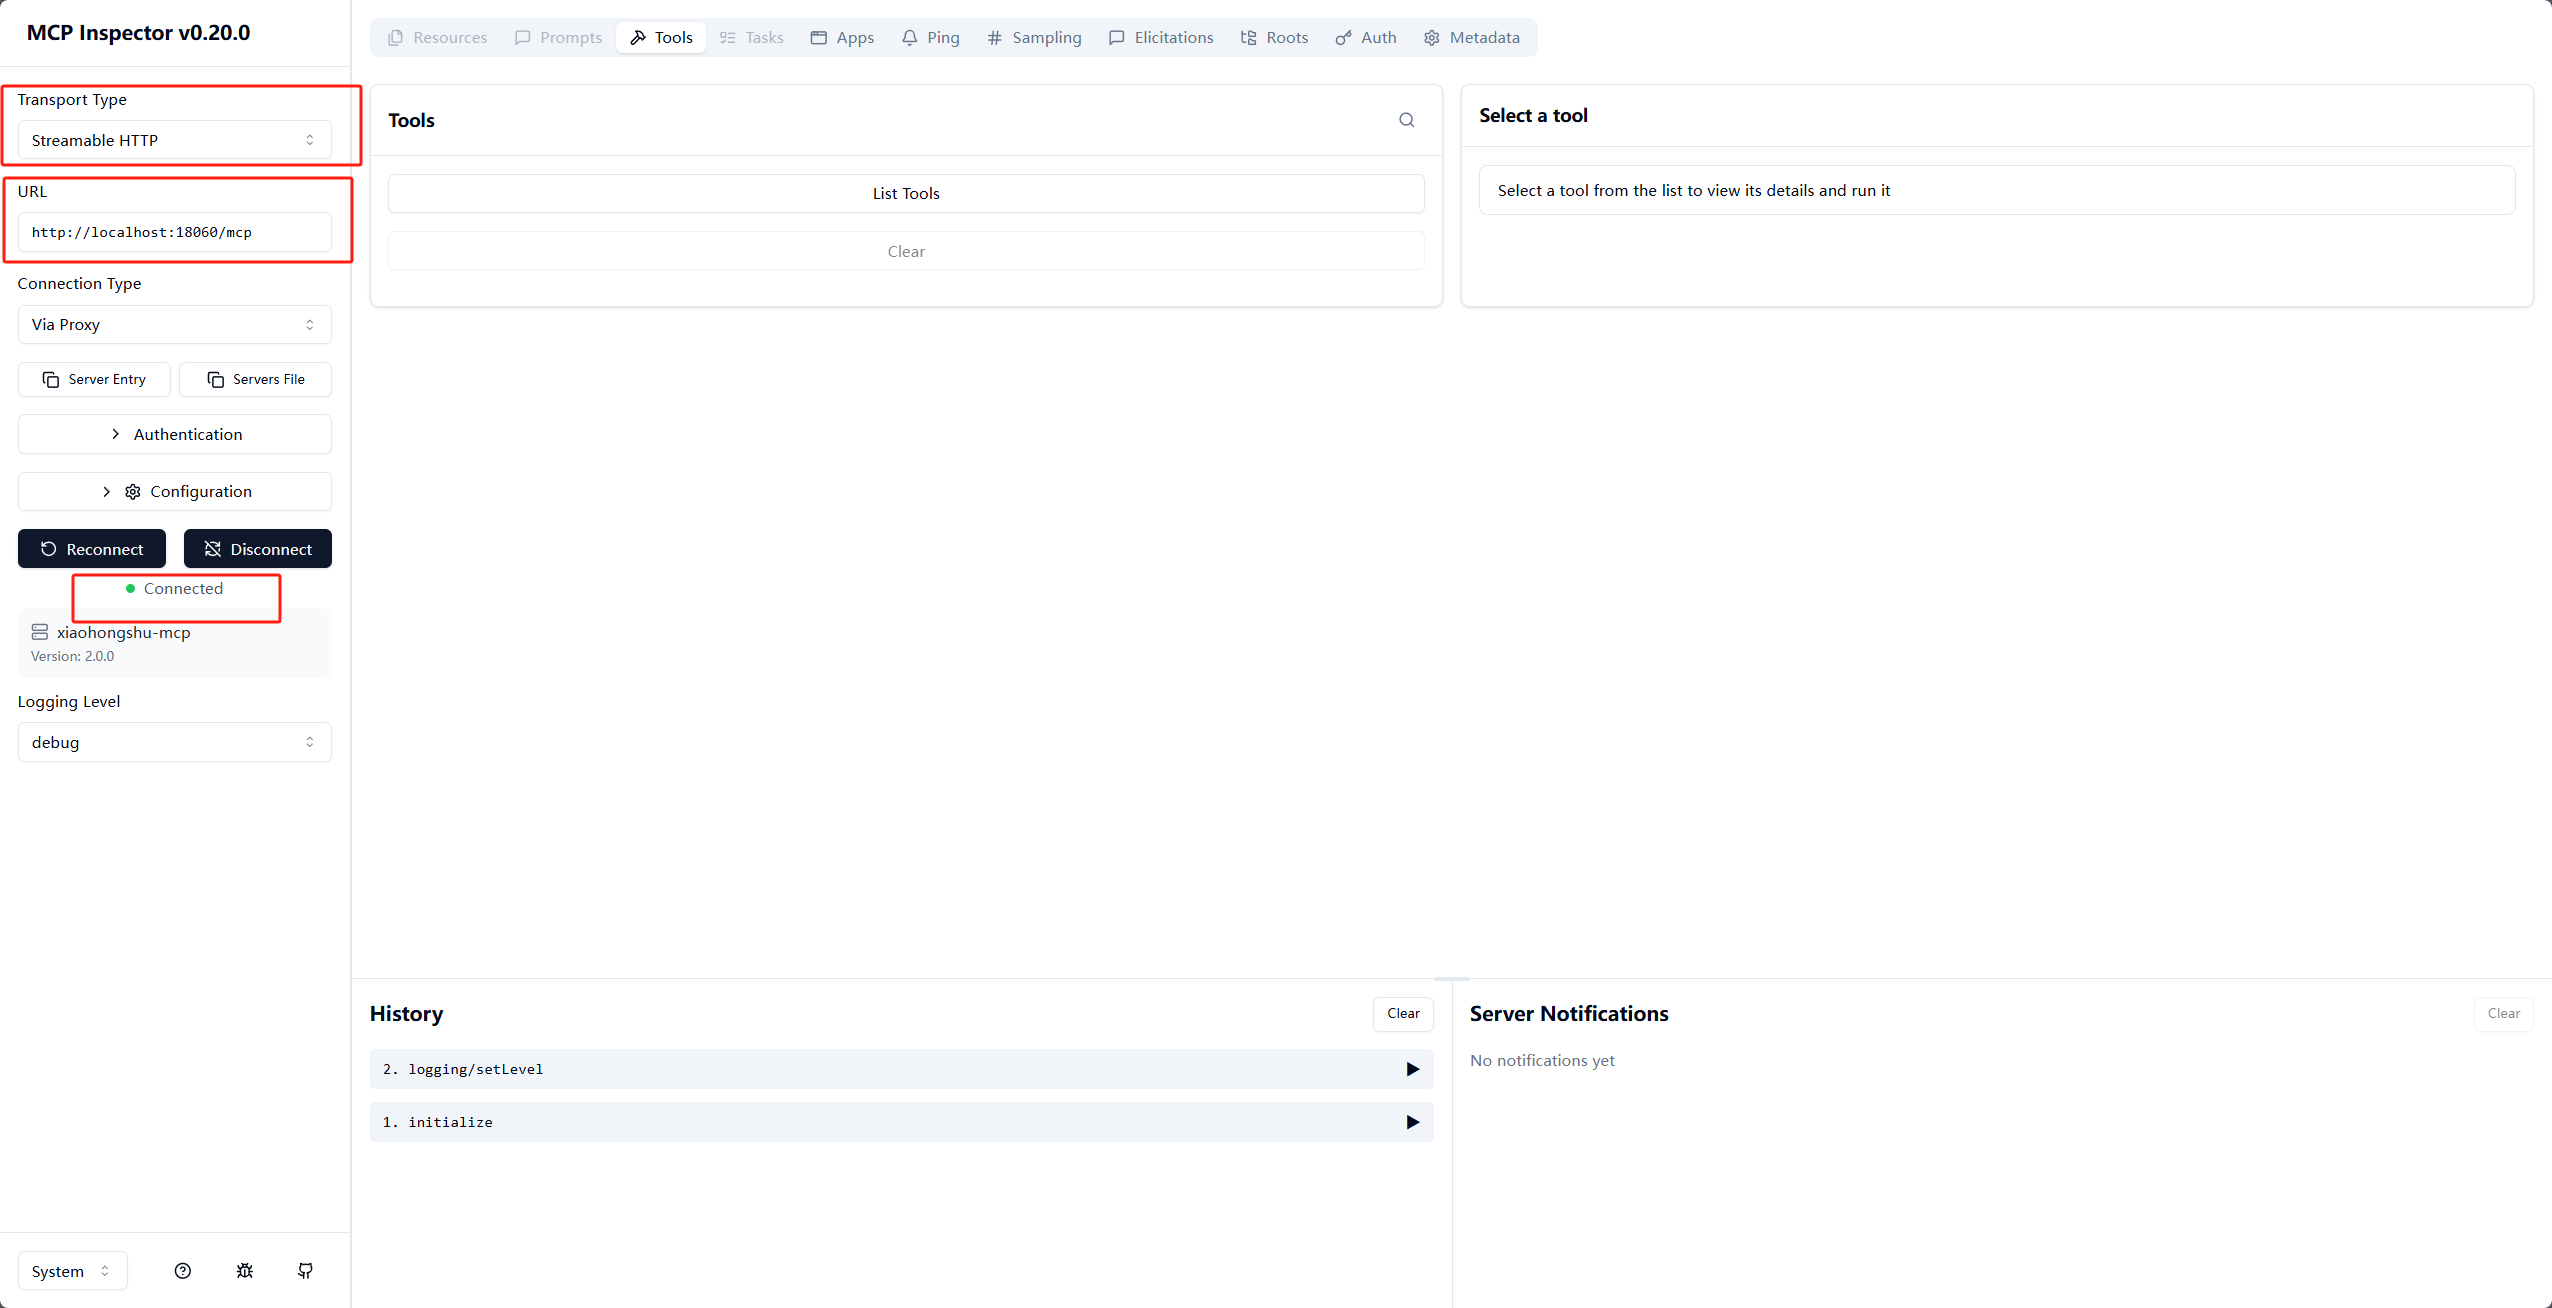
点击中间的List Tools
中间区域加载出小红书 MCP 的所有工具 / 能力列表、
四、接入Cursor编辑器
Cursor是支持MCP协议的AI编辑器,接入后可直接在Cursor中通过自然语言调用小红书MCP的所有功能,无需手动写接口请求。
4.1 找到Cursor的MCP配置文件
- 打开Cursor编辑器;
- 确认Cursor的MCP配置目录:
- 核心配置文件路径参考:
.cursor/mcp.json(可在Cursor的「设置→MCP」中找到配置入口,或直接在项目根目录创建该文件)。
- 核心配置文件路径参考:
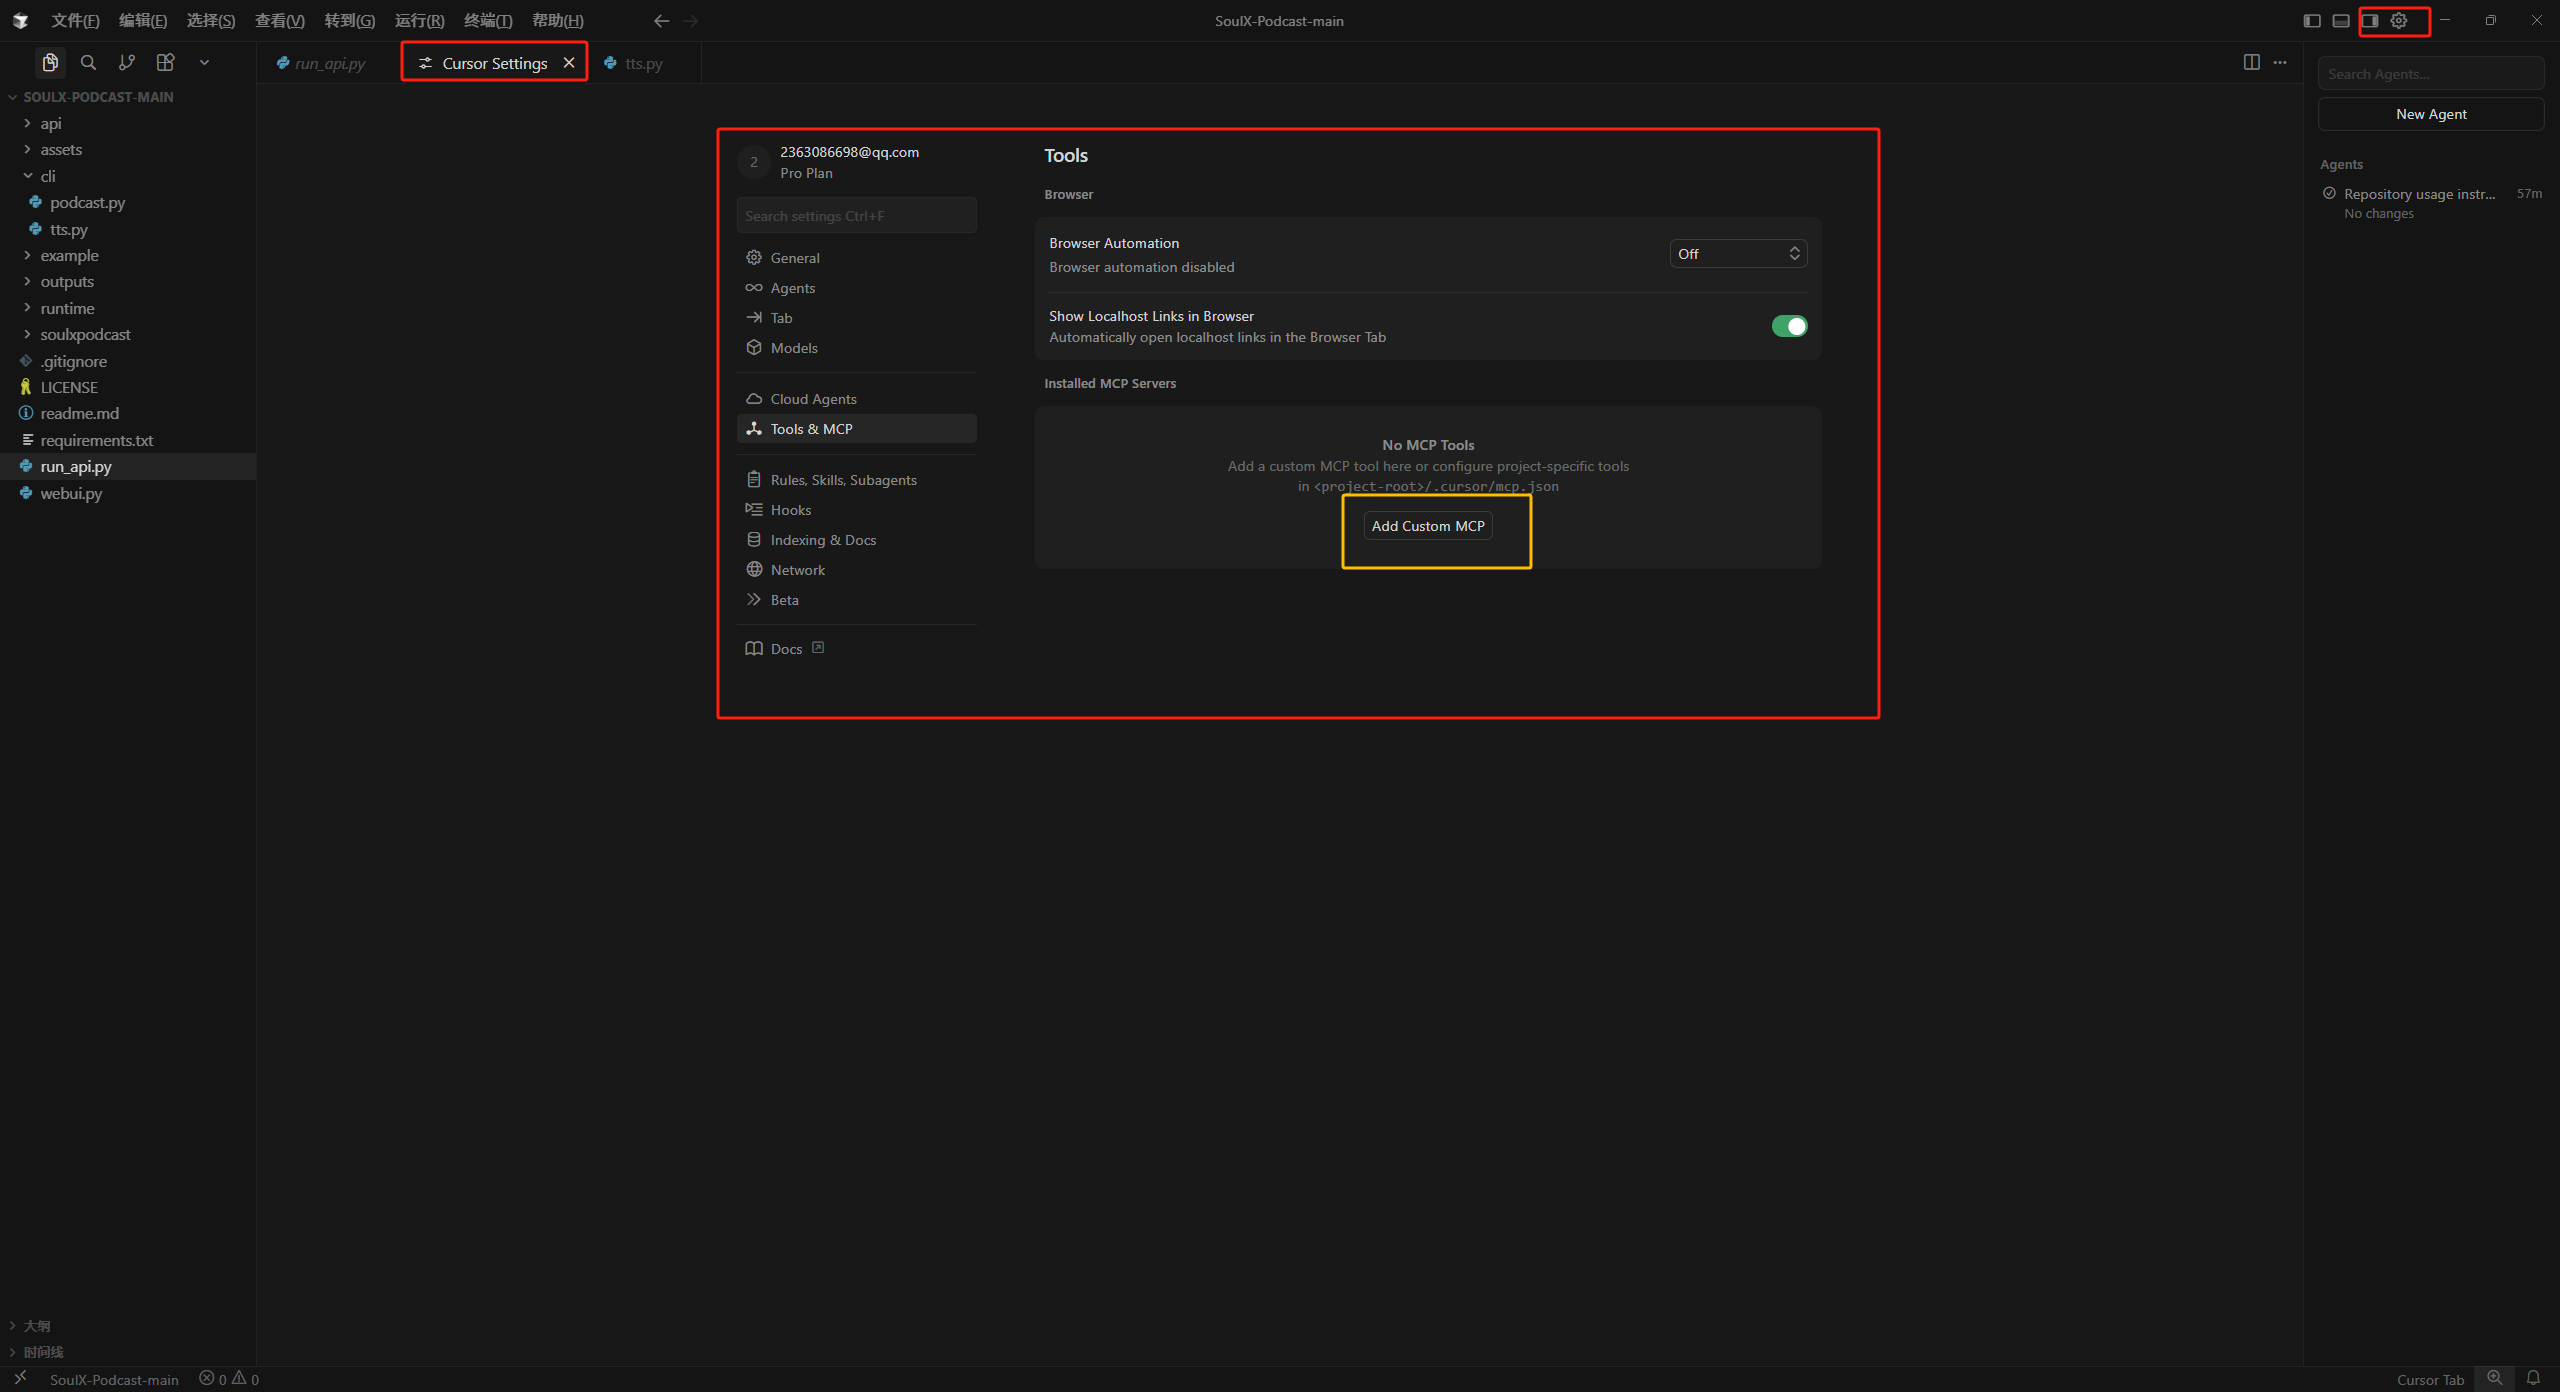
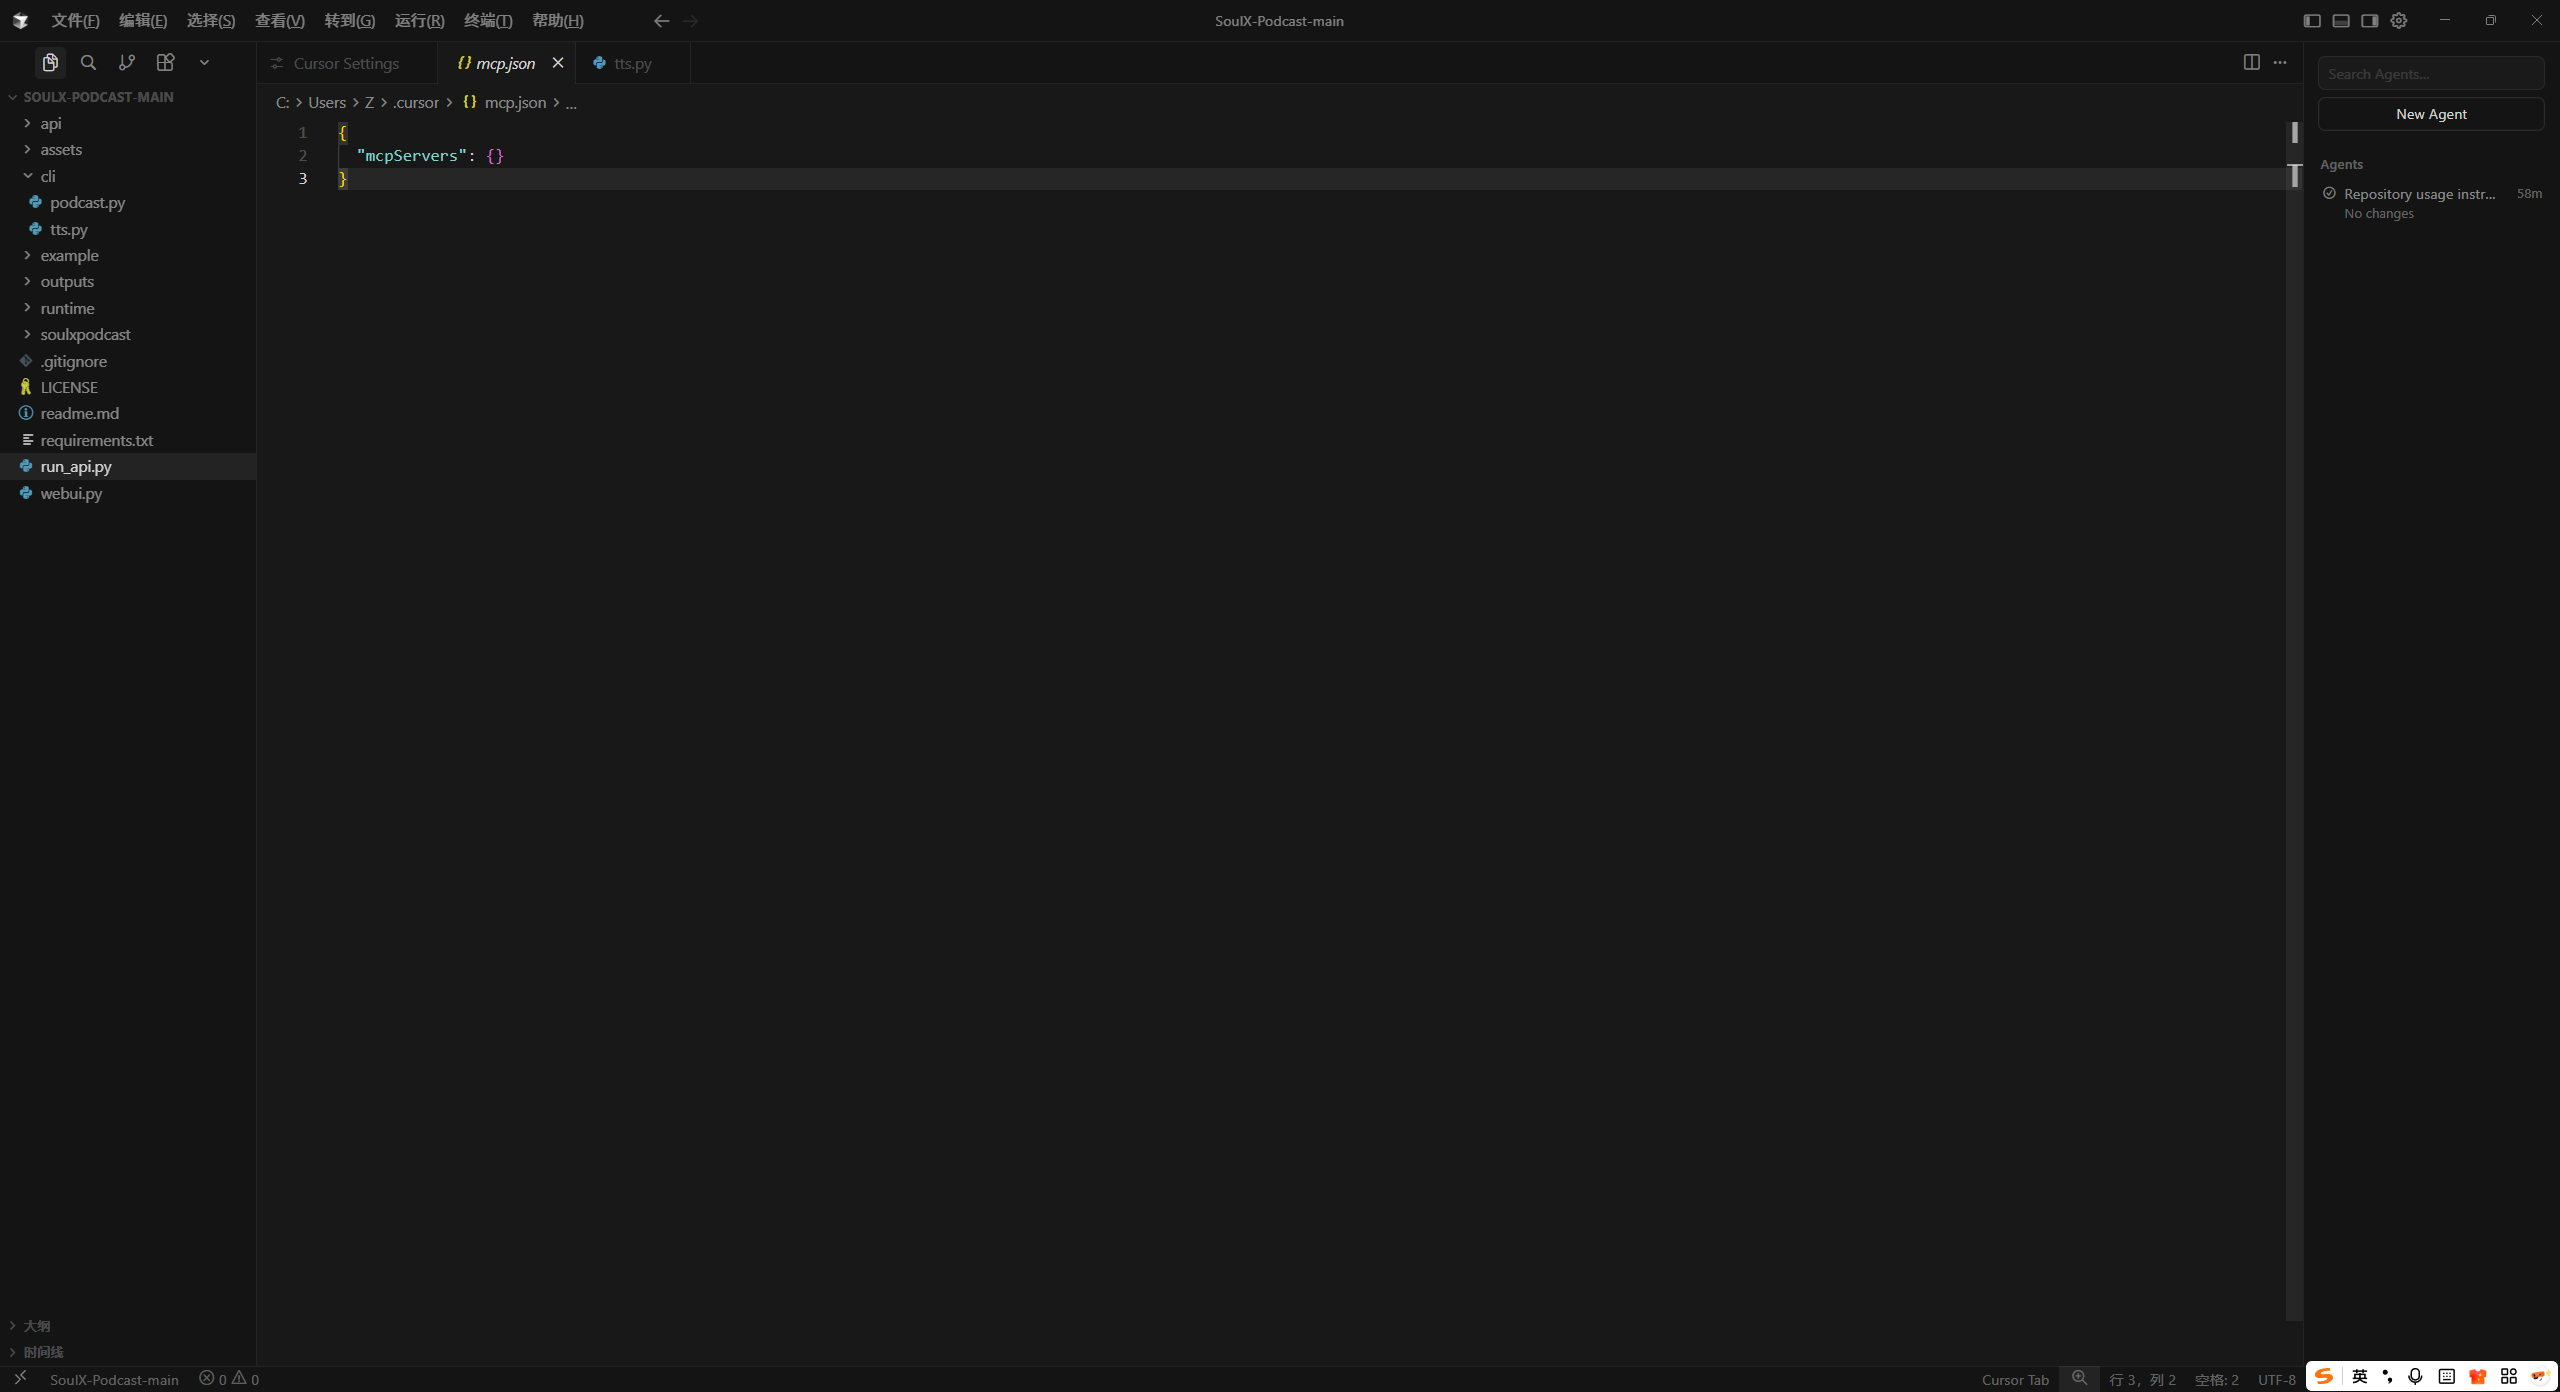
4.2 配置MCP连接信息
创建/编辑 .cursor/mcp.json 文件,写入以下内容:
{
    "mcpServers": {
        "xiaohongshu-mcp": {
            "url": "http://localhost:18060/mcp",
            "description": "小红书内容发布服务 - MCP Streamable HTTP"
        }
    }
}
保存文件后,重启Cursor让配置生效。

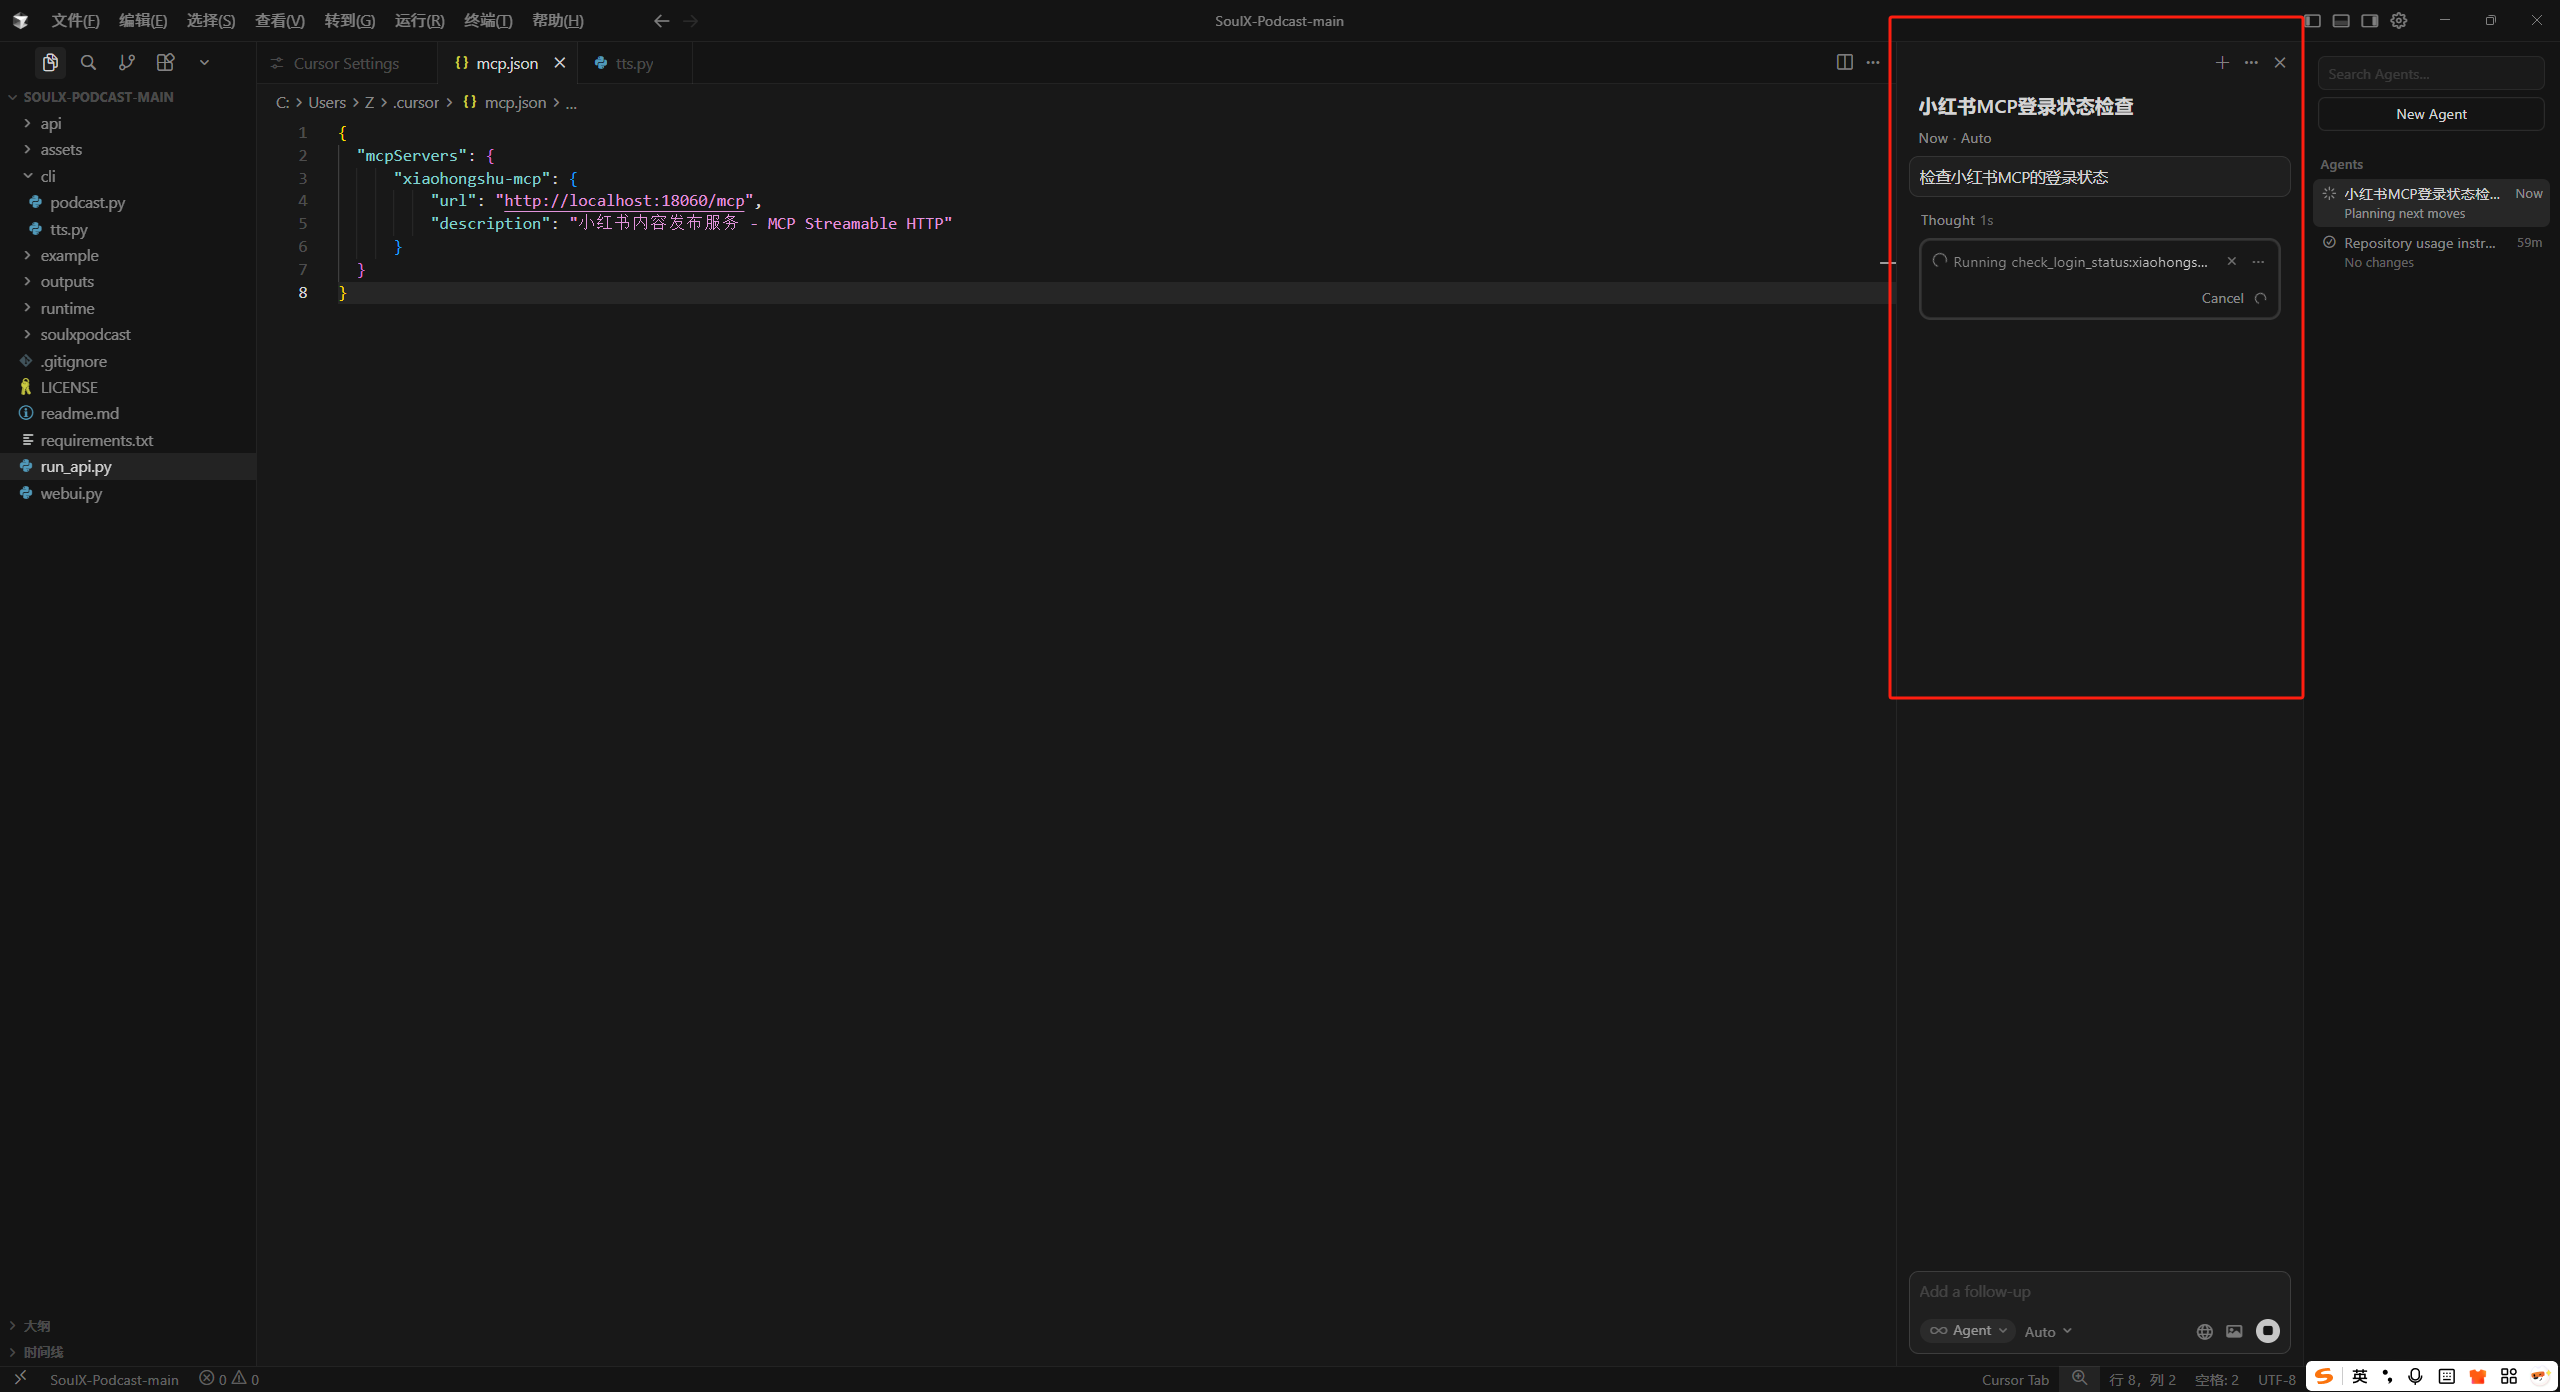
4.3 验证Cursor与MCP的连接
- 打开Cursor,新建一个对话窗口;
- 在输入框中输入:
检查小红书MCP的登录状态; - 发送指令后,Cursor会自动调用小红书MCP的「检查登录状态」功能,返回「当前账号已登录」即代表接入成功。
五、Cursor中使用小红书MCP实战
5.1 基础功能:检查登录状态
在Cursor对话框中输入:
检查我的小红书账号登录状态
发送后,MCP会返回当前账号的登录状态(已登录/未登录),如果未登录,需重新运行登录工具。

5.2 核心功能:发布小红书图文
步骤1:准备发布素材
- 本地图片:将图片放到MCP解压目录的
images文件夹(没有则新建); - 文案:标题(≤20字)+ 正文(≤1000字)+ 标签(可选)。
步骤2:在Cursor中发送发布指令
@xiaohongshu-mcp 发布一篇小红书图文,标题:「新手必看的MCP部署教程」,正文:「无需编译源码,下载安装包就能部署小红书MCP,附Cursor接入全流程~」,图片使用本地路径:/Users/你的用户名/xiaohongshu-mcp/images/教程封面.jpg,添加标签:#MCP #小红书自动化 #Cursor
注意:
- 图片路径需写绝对路径(Windows示例:
D:\xiaohongshu-mcp\images\教程封面.jpg);- 标题和正文需符合小红书字数限制(标题≤20字,正文≤1000字)。
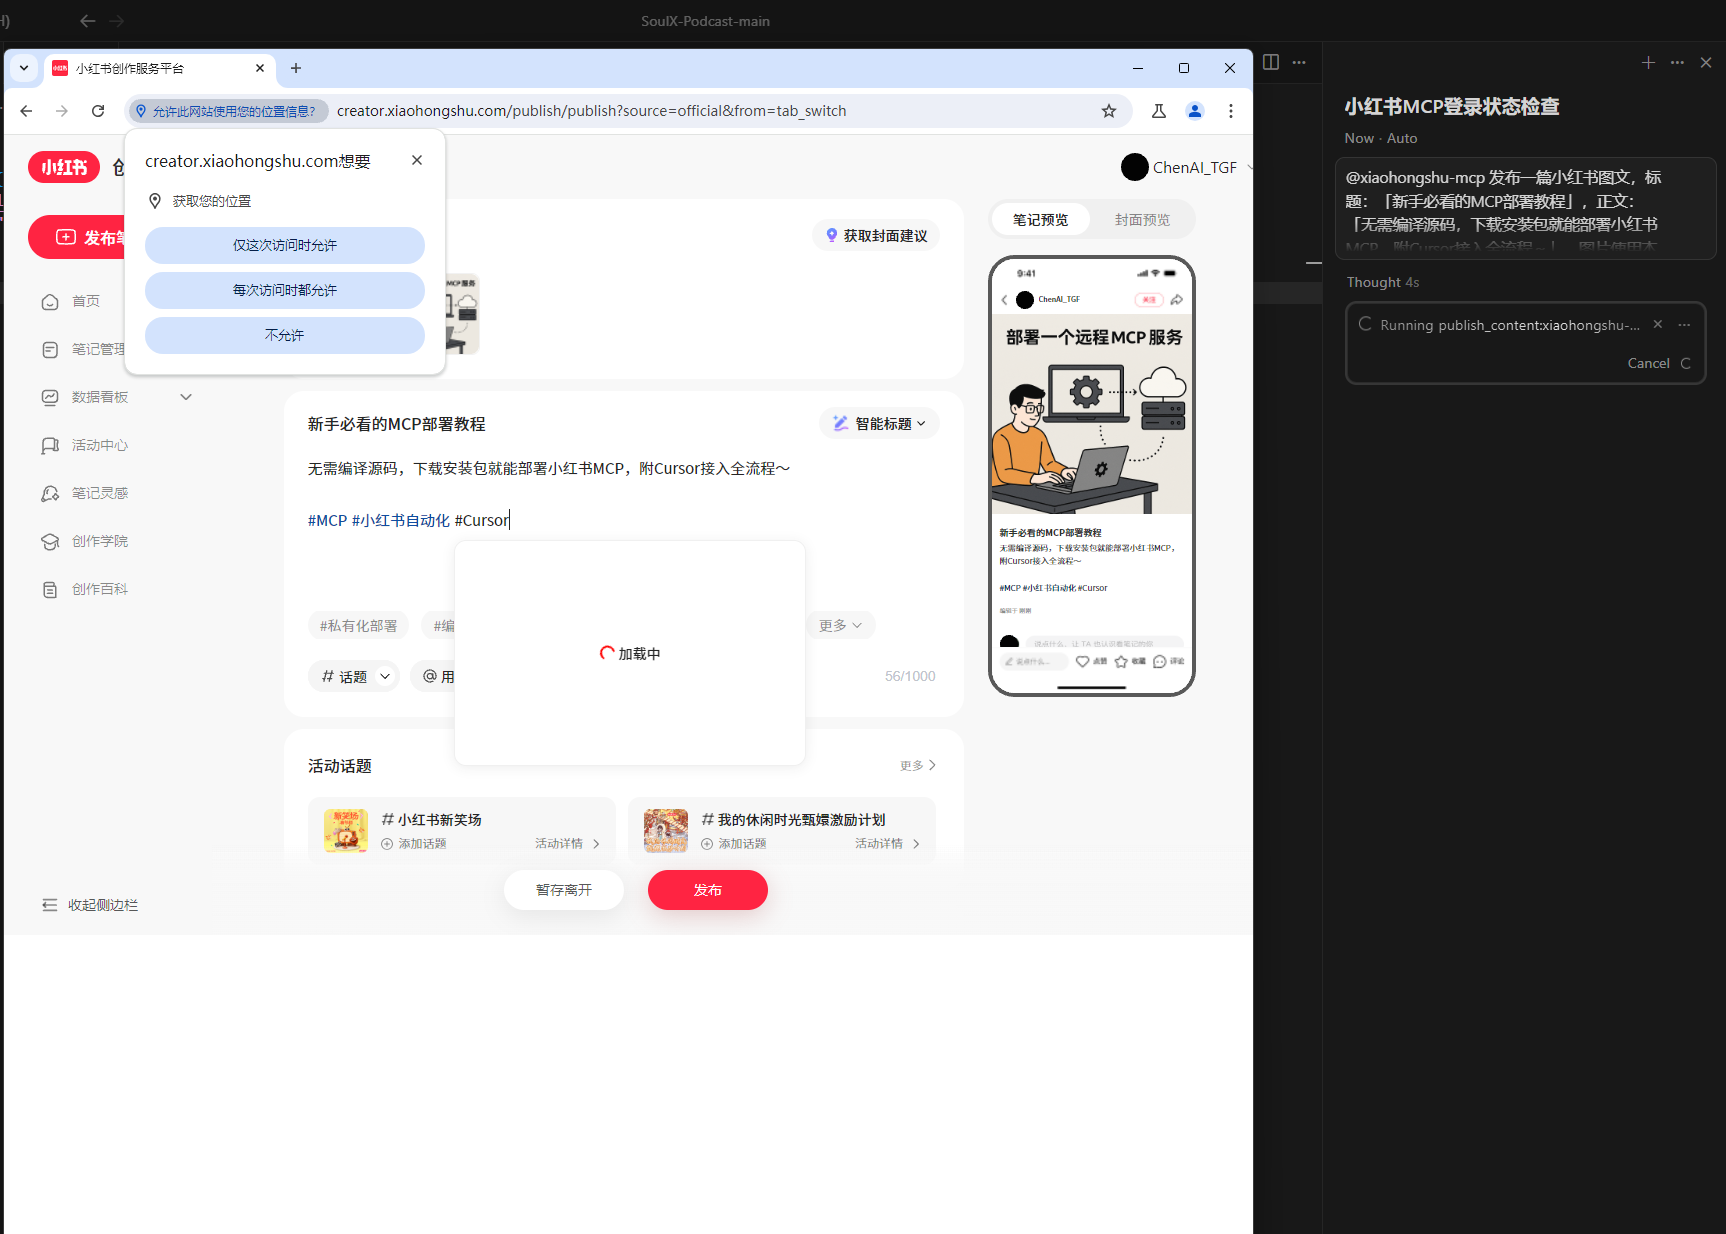
步骤3:查看发布结果
发送指令后,Cursor会返回发布进度,成功后可在小红书App中查看发布的笔记。
5.3 其他常用功能调用
- 发布视频:
@xiaohongshu-mcp 发布小红书视频,标题:「MCP部署实操演示」,正文:「手把手教你部署小红书MCP~」,视频路径:/Users/你的用户名/xiaohongshu-mcp/videos/演示.mp4 - 获取用户个人主页:
@xiaohongshu-mcp 获取用户ID为123456的小红书个人主页信息 - 发表评论:
@xiaohongshu-mcp 给帖子ID为741852的小红书笔记发表评论:「教程超实用!」
六、常见问题与解决方案
问题1:登录工具运行后无弹窗/下载浏览器失败
- 原因:网络限制或权限不足;
- 解决方案:
- 确保网络能访问外网,或切换网络重试;
- Windows需以管理员身份运行终端,macOS/Linux需赋予文件执行权限(
chmod +x 文件名)。
问题2:Cursor提示「无法连接到MCP服务」
- 原因:MCP服务未启动/端口被占用/配置文件路径错误;
- 解决方案:
- 检查MCP服务是否正常运行(终端是否显示端口18060);
- 确认
.cursor/mcp.json中的URL是http://localhost:18060/mcp; - 检查18060端口是否被占用(Windows:
netstat -ano | findstr 18060,macOS/Linux:lsof -i:18060),占用则关闭对应进程。
问题3:发布图文提示「图片路径错误」
- 原因:图片路径不是绝对路径/未放到指定目录;
- 解决方案:
- 使用绝对路径(如
D:\xiaohongshu-mcp\images\test.jpg); - 确保图片文件存在,且路径无中文/空格。
- 使用绝对路径(如
问题4:账号被踢下线
- 原因:同一账号在其他网页端登录;
- 解决方案:
- 退出其他网页端的小红书登录;
- 重新运行登录工具,重新生成Cookies。
七、总结
通过「下载安装包」的方式部署小红书MCP,全程无需配置复杂的开发环境(如Golang、Docker),新手也能在10分钟内完成部署。接入Cursor后,可直接通过自然语言调用MCP的所有功能,实现小红书登录验证、图文/视频发布、评论互动等自动化操作。
⚠️ 风险提示:该工具仅用于学习和个人合法运营,请勿用于违规操作;Cookies过期后需重新登录,正常使用下不会导致账号封禁。
如果在部署过程中遇到问题,可参考项目的官方文档(xiaohongshu-mcp README),或在GitHub Issues中提问。
零程式碼零基礎!小紅書MCP全自動化運營【保姆級安裝教程】
本文說明如何用預編譯安裝包部署小紅書 MCP:執行登入工具取得 cookies、啟動服務、以 MCP Inspector 驗證,並在 Cursor 的 .cursor/mcp.json 設定 Streamable HTTP,透過自然語言發布圖文/影片與互動,另附常見連線與路徑問題與合規提醒。
來源:https://blog.csdn.net/2403_87969572/article/details/158152972
抓取時間(ISO本地):2026-05-18 05:17:36
文章目錄
一、前言
小紅書MCP(xiaohongshu-mcp)是一款能實現小紅書自動化運營的工具,支援登入驗證、圖文/影片釋出、評論互動、使用者資訊查詢等核心功能。相比原始碼編譯、Docker部署,下載預編譯安裝包是最快捷的方式,無需配置開發環境,新手也能快速上手。
本文將全程基於「安裝包下載」的方式,手把手教你完成小紅書MCP的部署、接入Cursor編輯器,並演示核心功能的使用,讓你輕鬆實現小紅書內容的自動化管理。
二、準備工作
2.1 系統環境說明
支援的系統版本(請對應下載):
- macOS:Apple Silicon(arm64)/ Intel(amd64)
- Windows:x64(Windows 10/11 均可)
- Linux:x64
2.2 必裝依賴(僅2個,極簡)
(1)Node.js(用於MCP連線驗證)
無論哪個系統,建議透過官方推薦方式安裝Node.js LTS版本,確保環境變數自動配置:
- Windows:開啟「管理員命令列」執行
winget install OpenJS.NodeJS.LTS - macOS/Linux:參考 Node.js官方下載頁 安裝LTS版本
(2)網路環境
首次執行會自動下載無頭瀏覽器(約150MB),需確保網路通暢,後續無需重複下載。
2.3 下載小紅書MCP安裝包
- 開啟 xiaohongshu-mcp的GitHub Releases頁面
- 根據自己的系統下載對應安裝包:
- Windows x64:
xiaohongshu-mcp-windows-amd64.zip - macOS Apple Silicon:
xiaohongshu-mcp-darwin-arm64.zip - macOS Intel:
xiaohongshu-mcp-darwin-amd64.zip - Linux x64:
xiaohongshu-mcp-linux-amd64.zip
- Windows x64:
- 下載完成後,將壓縮包解壓到任意目錄(建議路徑不含中文/空格,比如
D:\xiaohongshu-mcp或/Users/你的使用者名稱/xiaohongshu-mcp)。
注意cookies.json是登入之後才會有的,剛剛解壓完只會有我圈起來的這兩個
三、部署小紅書MCP服務
3.1 解壓安裝包並確認檔案結構
解壓後目錄內會包含兩個核心檔案(以Windows為例):
xiaohongshu-login-windows-amd64.exe:登入工具(必先執行)xiaohongshu-mcp-windows-amd64.exe:MCP主服務程式
其他系統對應檔案:macOS是
xiaohongshu-login-darwin-arm64/xiaohongshu-mcp-darwin-arm64,Linux是xiaohongshu-login-linux-amd64/xiaohongshu-mcp-linux-amd64。
3.2 執行登入工具完成小紅書認證
這是核心步驟,MCP服務依賴登入後的Cookies才能正常工作:
- 開啟終端/命令列,進入解壓目錄:
- Windows:在解壓資料夾空白處右鍵 → 「在終端中開啟」
- macOS/Linux:開啟終端,執行
cd /你的解壓路徑/xiaohongshu-mcp
- 執行登入工具:
- Windows:
./xiaohongshu-login-windows-amd64.exe - macOS/Linux:
chmod +x xiaohongshu-login-darwin-arm64  # 賦予執行許可權(僅首次)
./xiaohongshu-login-darwin-arm64
- Windows:
- 登入流程:
- 執行後會自動下載無頭瀏覽器(耐心等待);
- 彈出小紅書登入頁面(掃碼/手機號登入均可);
- 登入成功後,終端會提示「登入成功」,並自動生成
cookies.json檔案(儲存在當前目錄,切勿刪除)。
⚠️ 重要提醒:小紅書賬號不允許多網頁端登入,登入MCP後,不要在其他瀏覽器登入同一賬號,否則會被踢下線(手機App登入不受影響)。
3.3 啟動MCP主服務
登入成功後,繼續在終端執行以下命令啟動MCP服務:
- Windows:
# 無頭模式(無瀏覽器介面,推薦生產使用) ./xiaohongshu-mcp-windows-amd64.exe # 非無頭模式(有瀏覽器介面,除錯用) ./xiaohongshu-mcp-windows-amd64.exe -headless=false - macOS/Linux:
chmod +x xiaohongshu-mcp-darwin-arm64  # 賦予執行許可權(僅首次)
# 無頭模式
./xiaohongshu-mcp-darwin-arm64
# 非無頭模式
./xiaohongshu-mcp-darwin-arm64 -headless=false
啟動成功的標誌:終端無報錯,且顯示「MCP服務啟動成功,埠:18060」(預設埠18060,請勿佔用)。
3.4 驗證MCP服務是否正常
執行以下命令驗證服務可用性:
npx @modelcontextprotocol/inspector
左上角Transport Type下拉框,把STDIO改成Streamable HTTP;
改完後介面會出現URL輸入框,把http://localhost:18060/mcp填到這個 URL 框裡;
點選左側的Connect按鈕。
成功標誌:左下角顯示Connected
點選中間的List Tools
中間區域載入出小紅書 MCP 的所有工具 / 能力列表、
四、接入Cursor編輯器
Cursor是支援MCP協議的AI編輯器,接入後可直接在Cursor中透過自然語言呼叫小紅書MCP的所有功能,無需手動寫介面請求。
4.1 找到Cursor的MCP配置檔案
- 開啟Cursor編輯器;
- 確認Cursor的MCP配置目錄:
- 核心配置檔案路徑參考:
.cursor/mcp.json(可在Cursor的「設定→MCP」中找到配置入口,或直接在專案根目錄建立該檔案)。
- 核心配置檔案路徑參考:
4.2 配置MCP連線資訊
建立/編輯 .cursor/mcp.json 檔案,寫入以下內容:
{
    "mcpServers": {
        "xiaohongshu-mcp": {
            "url": "http://localhost:18060/mcp",
            "description": "小紅書內容釋出服務 - MCP Streamable HTTP"
        }
    }
}
儲存檔案後,重啟Cursor讓配置生效。
4.3 驗證Cursor與MCP的連線
- 開啟Cursor,新建一個對話視窗;
- 在輸入框中輸入:
檢查小紅書MCP的登入狀態; - 傳送指令後,Cursor會自動呼叫小紅書MCP的「檢查登入狀態」功能,返回「當前賬號已登入」即代表接入成功。
五、Cursor中使用小紅書MCP實戰
5.1 基礎功能:檢查登入狀態
在Cursor對話方塊中輸入:
檢查我的小紅書賬號登入狀態
傳送後,MCP會返回當前賬號的登入狀態(已登入/未登入),如果未登入,需重新執行登入工具。
5.2 核心功能:釋出小紅書圖文
步驟1:準備釋出素材
- 本地圖片:將圖片放到MCP解壓目錄的
images資料夾(沒有則新建); - 文案:標題(≤20字)+ 正文(≤1000字)+ 標籤(可選)。
步驟2:在Cursor中傳送釋出指令
@xiaohongshu-mcp 釋出一篇小紅書圖文,標題:「新手必看的MCP部署教程」,正文:「無需編譯原始碼,下載安裝包就能部署小紅書MCP,附Cursor接入全流程~」,圖片使用本地路徑:/Users/你的使用者名稱/xiaohongshu-mcp/images/教程封面.jpg,新增標籤:#MCP #小紅書自動化 #Cursor
注意:
- 圖片路徑需寫絕對路徑(Windows示例:
D:\xiaohongshu-mcp\images\教程封面.jpg);- 標題和正文需符合小紅書字數限制(標題≤20字,正文≤1000字)。
步驟3:檢視釋出結果
傳送指令後,Cursor會返回釋出進度,成功後可在小紅書App中檢視釋出的筆記。
5.3 其他常用功能呼叫
- 釋出影片:
@xiaohongshu-mcp 釋出小紅書影片,標題:「MCP部署實操演示」,正文:「手把手教你部署小紅書MCP~」,影片路徑:/Users/你的使用者名稱/xiaohongshu-mcp/videos/演示.mp4 - 獲取使用者個人主頁:
@xiaohongshu-mcp 獲取使用者ID為123456的小紅書個人主頁資訊 - 發表評論:
@xiaohongshu-mcp 給帖子ID為741852的小紅書筆記發表評論:「教程超實用!」
六、常見問題與解決方案
問題1:登入工具執行後無彈窗/下載瀏覽器失敗
- 原因:網路限制或許可權不足;
- 解決方案:
- 確保網路能訪問外網,或切換網路重試;
- Windows需以管理員身份執行終端,macOS/Linux需賦予檔案執行許可權(
chmod +x 檔名)。
問題2:Cursor提示「無法連線到MCP服務」
- 原因:MCP服務未啟動/埠被佔用/配置檔案路徑錯誤;
- 解決方案:
- 檢查MCP服務是否正常執行(終端是否顯示埠18060);
- 確認
.cursor/mcp.json中的URL是http://localhost:18060/mcp; - 檢查18060埠是否被佔用(Windows:
netstat -ano | findstr 18060,macOS/Linux:lsof -i:18060),佔用則關閉對應程序。
問題3:釋出圖文提示「圖片路徑錯誤」
- 原因:圖片路徑不是絕對路徑/未放到指定目錄;
- 解決方案:
- 使用絕對路徑(如
D:\xiaohongshu-mcp\images\test.jpg); - 確保圖片檔案存在,且路徑無中文/空格。
- 使用絕對路徑(如
問題4:賬號被踢下線
- 原因:同一賬號在其他網頁端登入;
- 解決方案:
- 退出其他網頁端的小紅書登入;
- 重新執行登入工具,重新生成Cookies。
七、總結
透過「下載安裝包」的方式部署小紅書MCP,全程無需配置複雜的開發環境(如Golang、Docker),新手也能在10分鐘內完成部署。接入Cursor後,可直接透過自然語言呼叫MCP的所有功能,實現小紅書登入驗證、圖文/影片釋出、評論互動等自動化操作。
⚠️ 風險提示:該工具僅用於學習和個人合法運營,請勿用於違規操作;Cookies過期後需重新登入,正常使用下不會導致賬號封禁。
如果在部署過程中遇到問題,可參考專案的官方文件(xiaohongshu-mcp README),或在GitHub Issues中提問。
No Code, No Experience Needed! Hands-On Install Guide for Xiaohongshu MCP Full Automation
This article walks through deploying Xiaohongshu MCP from prebuilt zips: login tool → cookies, starting the server on port 18060, verifying with the MCP Inspector over Streamable HTTP, and wiring http://localhost:18060/mcp into Cursor’s MCP config for natural-language posting and automation, plus troubleshooting and usage notes.
Captured at (local ISO): 2026-05-18 05:17:36
I. Introduction
Xiaohongshu MCP (xiaohongshu-mcp) is a tool for automating Xiaohongshu operations: login verification, image/video posts, comments, user profile lookup, and more. Compared with building from source or Docker, downloading a prebuilt package is fastest—no dev environment setup—and beginners can get going quickly.
This post uses the package download path end‑to‑end: deploy Xiaohongshu MCP, wire it into Cursor, and show core features so you can automate Xiaohongshu content management.
II. Preparation
2.1 System environment
Supported OS (download the matching build):
- macOS: Apple Silicon (arm64) / Intel (amd64)
- Windows: x64 (Windows 10/11)
- Linux: x64
2.2 Required dependencies (only two)
(1) Node.js (for MCP connection checks)
On every OS, install Node.js LTS the recommended way so PATH is set automatically:
- Windows: open an elevated command prompt and run:
winget install OpenJS.NodeJS.LTS - macOS/Linux: install LTS from the official Node.js downloads page
(2) Network
The first run downloads a headless browser (~150 MB); keep the network stable. Later runs won’t repeat the download.
2.3 Download the Xiaohongshu MCP package
- Open the xiaohongshu-mcp GitHub Releases page.
- Pick the zip for your system:
- Windows x64:
xiaohongshu-mcp-windows-amd64.zip - macOS Apple Silicon:
xiaohongshu-mcp-darwin-arm64.zip - macOS Intel:
xiaohongshu-mcp-darwin-amd64.zip - Linux x64:
xiaohongshu-mcp-linux-amd64.zip
- Windows x64:
- Unzip anywhere (avoid Chinese characters or spaces in the path, e.g.
D:\xiaohongshu-mcpor/Users/yourname/xiaohongshu-mcp).
Note: cookies.json only appears after login; right after unzip you’ll only have the two files circled in the screenshot.
III. Deploy the Xiaohongshu MCP service
3.1 Unzip and verify layout
After unzip you should see two core files (Windows example):
xiaohongshu-login-windows-amd64.exe: login tool (run this first)xiaohongshu-mcp-windows-amd64.exe: main MCP server
Other OS names: macOS uses
xiaohongshu-login-darwin-arm64/xiaohongshu-mcp-darwin-arm64; Linux usesxiaohongshu-login-linux-amd64/xiaohongshu-mcp-linux-amd64.
3.2 Run the login tool
The MCP server needs cookies from a successful login:
- Open a terminal in the unzip folder:
- Windows: right‑click empty area → “Open in Terminal”
- macOS/Linux:
cd /path/to/xiaohongshu-mcp
- Run the login tool:
- Windows:
./xiaohongshu-login-windows-amd64.exe - macOS/Linux:
chmod +x xiaohongshu-login-darwin-arm64  # first time only
./xiaohongshu-login-darwin-arm64
- Windows:
- Login flow:
- Headless browser downloads automatically (wait patiently);
- Xiaohongshu login UI appears (QR or phone);
- On success the terminal shows “login successful” and writes
cookies.jsonin the current directory—do not delete it.
Important: Xiaohongshu does not allow many simultaneous web sessions. After logging in here, don’t log in to the same account in another browser, or you’ll be kicked offline (the mobile app is unaffected).
3.3 Start the main MCP service
After login, start the server from the same terminal:
- Windows:
# Headless (no browser UI—recommended for normal use) ./xiaohongshu-mcp-windows-amd64.exe # Non-headless (visible browser—for debugging) ./xiaohongshu-mcp-windows-amd64.exe -headless=false - macOS/Linux:
chmod +x xiaohongshu-mcp-darwin-arm64  # first time only
# headless
./xiaohongshu-mcp-darwin-arm64
# non-headless
./xiaohongshu-mcp-darwin-arm64 -headless=false
Success: no errors in the terminal and a line like “MCP service started, port: 18060” (default 18060—don’t bind something else there).
3.4 Verify the MCP service
npx @modelcontextprotocol/inspector
In the top‑left Transport Type dropdown, change STDIO to Streamable HTTP;
a URL field appears—enter http://localhost:18060/mcp;
click Connect on the left.
Success: Connected shows at the bottom left.
Click List Tools in the center;
the middle pane lists all Xiaohongshu MCP tools/capabilities.
IV. Connect Cursor
Cursor speaks MCP—after wiring it in you can call every Xiaohongshu MCP capability with natural language, no manual HTTP.
4.1 Find Cursor’s MCP config
- Open Cursor.
- MCP config location:
- Typical path:
.cursor/mcp.json(Settings → MCP, or create under project root).
- Typical path:
4.2 Configure the connection
Create or edit .cursor/mcp.json:
{
    "mcpServers": {
        "xiaohongshu-mcp": {
            "url": "http://localhost:18060/mcp",
            "description": "Xiaohongshu publishing service - MCP Streamable HTTP"
        }
    }
}
Save and restart Cursor.
4.3 Verify Cursor ↔ MCP
- Open a new chat in Cursor.
- Type:
Check Xiaohongshu MCP login status. - If it returns that the account is logged in, the integration works.
V. Hands-on in Cursor
5.1 Check login status
Check my Xiaohongshu login status
You’ll get logged‑in / not logged‑in. If not logged in, run the login tool again.
5.2 Publish an image-text post
Step 1: assets
- Images: put files under an
imagesfolder next to the MCP binaries (create if missing). - Copy: title (≤20 Chinese chars rule on platform) + body (≤1000) + hashtags (optional).
Step 2: command in Cursor
@xiaohongshu-mcp Publish a Xiaohongshu image post. Title: “MCP setup guide for beginners”. Body: “No source build—download the package and deploy Xiaohongshu MCP, plus full Cursor wiring.” Image absolute path: /Users/yourname/xiaohongshu-mcp/images/cover.jpg. Tags: #MCP #XiaohongshuAutomation #Cursor
Notes:
- Use absolute image paths (Windows example:
D:\xiaohongshu-mcp\images\cover.jpg).- Respect Xiaohongshu length limits for title and body.
Step 3: result
Cursor shows progress; when done, check the note in the Xiaohongshu app.
5.3 Other common calls
- Publish video:
@xiaohongshu-mcp Publish a Xiaohongshu video. Title: “MCP deploy demo”. Body: “Step‑by‑step Xiaohongshu MCP.” Video path: /Users/yourname/xiaohongshu-mcp/videos/demo.mp4 - User profile:
@xiaohongshu-mcp Get Xiaohongshu profile for user ID 123456 - Comment:
@xiaohongshu-mcp Comment on Xiaohongshu note ID 741852: “Super helpful tutorial!”
VI. FAQ
Issue 1: no window / browser download fails
- Cause: network or permissions.
- Fix:
- Ensure outbound internet; switch networks if needed.
- Windows: run terminal as admin; macOS/Linux:
chmod +x filename.
Issue 2: Cursor cannot connect to MCP
- Cause: server not running, port taken, or wrong URL in config.
- Fix:
- Confirm the MCP process is up (port 18060).
mcp.jsonURL must behttp://localhost:18060/mcp.- Check 18060: Windows
netstat -ano | findstr 18060; macOS/Linuxlsof -i:18060—kill the conflicting process.
Issue 3: “image path error” when publishing
- Cause: relative path or wrong folder.
- Fix:
- Use absolute paths (e.g.
D:\xiaohongshu-mcp\images\test.jpg). - File must exist; avoid Chinese/space issues if your toolchain is picky.
- Use absolute paths (e.g.
Issue 4: kicked offline
- Cause: same account logged in elsewhere on the web.
- Fix:
- Log out other web sessions.
- Re-run the login tool to refresh cookies.
VII. Summary
With the prebuilt package you skip heavy setup (Go, Docker, etc.) and can deploy in ~10 minutes. In Cursor, natural language drives login checks, posts, video, comments, and more.
⚠️ Risk: use only for learning and legitimate personal operations; don’t abuse. When cookies expire, log in again—normal use shouldn’t ban your account.
If stuck, see the xiaohongshu-mcp README or open a GitHub Issue.