Streamlit:CSS——从基础到实战美化应用
介绍 Streamlit 中通过 st.markdown、st.html 与外部 CSS 自定义标题、按钮、表格样式,并完成品牌化销售数据展示示例。
一、前言
在上一篇博客中,我们已经学会用 Streamlit 快速搭建数据应用:从st.title()设置标题、st.dataframe()展示数据,到st.button()实现交互,短短几行代码就能跑通核心功能。但实际项目中,默认的 “灰白底色、简单按钮、左对齐标题” 往往不够美观
比如企业应用需要匹配品牌色,个人项目想突出重点数据,这时候CSS(层叠样式表)就成了关键工具:它能突破 Streamlit 默认样式限制,自定义组件外观、布局甚至交互效果,让应用从 “能用” 升级为 “好用又好看”。
二、CSS 是什么
先明确基础概念:CSS 本身是用于描述网页元素样式的语言(如颜色、字体、间距),而在 Streamlit 中,CSS 的核心作用是 “修改 Streamlit 生成的网页组件样式”—— 因为 Streamlit 本质是将 Python 代码转化为网页,其组件(按钮、表格、标题等)都会对应网页中的 HTML 标签和类名(如按钮对应标签,类名为stButton),我们通过 CSS 选择器定位这些组件,再定义样式规则即可实现自定义。
简单说:Streamlit 负责 “搭骨架”(功能),CSS 负责 “穿衣服”(美化)。
三、Streamlit 中 CSS 的 3 种核心用法
Streamlit 没有专门的 “CSS 接口”,但提供了两种嵌入 CSS 的常用方式,结合基础选择器就能满足大部分需求。以下是实操方法(附代码示例):
方法 1:用st.markdown()嵌入 CSS(兼容所有版本)
Streamlit 的st.markdown()支持渲染 HTML,只需添加unsafe_allow_html=True参数,就能嵌入
import streamlit as st
# 嵌入CSS:用<style>标签包裹,通过类名定位Streamlit组件
st.markdown("""
<style>
/* 1. 自定义标题样式(定位<h1>标签) */
h1 {
color: #2E86AB; /* 品牌蓝色 */
text-align: center; /* 居中对齐 */
font-family: '微软雅黑', sans-serif; /* 字体 */
margin-bottom: 30px; /* 底部间距 */
}
/* 2. 自定义按钮样式(定位Streamlit按钮类名.stButton) */
.stButton > button {
background-color: #A23B72; /* 按钮底色:粉色 */
color: white; /* 文字白色 */
border: none; /* 取消边框 */
border-radius: 8px; /* 圆角 */
padding: 10px 20px; /* 内边距:上下10px,左右20px */
font-size: 16px; /* 字体大小 */
}
/* 3. 按钮hover效果(鼠标悬浮时) */
.stButton > button:hover {
background-color: #F18F01; /* 底色变橙色 */
transform: scale(1.05); /* 轻微放大(1.05倍) */
transition: all 0.3s ease; /* 过渡动画:0.3秒生效 */
}
</style>
""", unsafe_allow_html=True)
# 测试样式:标题和按钮
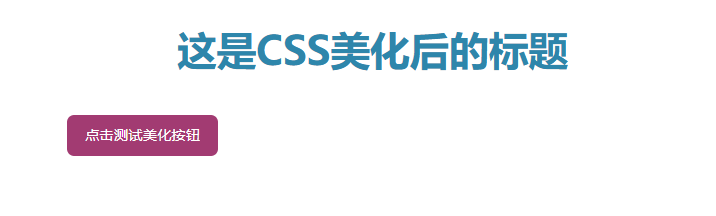
st.title("这是CSS美化后的标题")
st.button("点击测试美化按钮")
效果如下:
关键说明:
需用 style 标签包裹 CSS 代码,且必须加unsafe_allow_html=True(Streamlit 默认禁止 HTML,开启后需确保 CSS 来源安全);
Streamlit 组件的类名可通过 “浏览器检查” 获取(右键组件→“检查”,查看 HTML 标签的class属性)。具体图示方法如下:

方法 2:用st.html()嵌入 CSS(Streamlit 1.10 + 版本)
Streamlit 1.10 版本后新增了st.html()组件,专门用于渲染 HTML/CSS,无需写unsafe_allow_html=True,代码更简洁。
示例:修改数据表格样式
import streamlit as st
import pandas as pd
import numpy as np
# 用st.html()嵌入CSS:更简洁,无需额外参数
st.html("""
<style>
/* 1. 自定义表格容器样式(定位.stDataFrame) */
.stDataFrame {
width: 90% !important; /* 表格宽度90%(!important强制覆盖默认) */
margin: 20px auto; /* 上下间距20px,左右自动(实现居中) */
}
/* 2. 表格表头样式(定位表头类名) */
[data-testid="stDataFrameHeader"] {
background-color: #2E86AB !important; /* 表头底色蓝色 */
}
[data-testid="stDataFrameHeader"] th {
color: white !important; /* 表头文字白色 */
font-weight: bold !important; /* 文字加粗 */
}
/* 3. 表格行hover效果(鼠标悬浮行) */
[data-testid="stDataFrameRow"]:hover {
background-color: #F8F9FA !important; /* 行底色变浅灰 */
}
</style>
""")
# 生成测试数据并展示表格(测试样式)
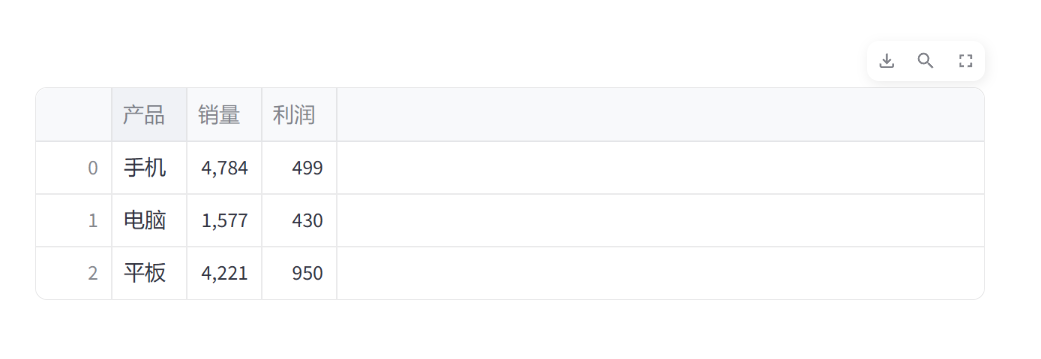
data = pd.DataFrame({
"产品": ["手机", "电脑", "平板"],
"销量": np.random.randint(1000, 5000, 3),
"利润": np.random.randint(200, 1000, 3)
})
st.dataframe(data)
效果如下
方法 3:外部 CSS 文件(适合复杂样式)
如果 CSS 规则较多(如多个页面共用样式),可单独创建.css文件,再用st.markdown()读取并嵌入。
步骤:
创建style.css文件,写入样式:
/* style.css */
h3 { color: #F18F01; } /* 对应 st.subheader() */
h2 { color: #F18F01; } /* 对应 st.header() */
.stSelectbox { margin: 10px 0; }
在 Streamlit 代码中读取文件:
import streamlit as st
# 读取外部CSS文件
with open("style.css", "r") as f:
css = f.read()
# 嵌入CSS
st.markdown(f"<style>{css}</style>", unsafe_allow_html=True)
# 测试样式
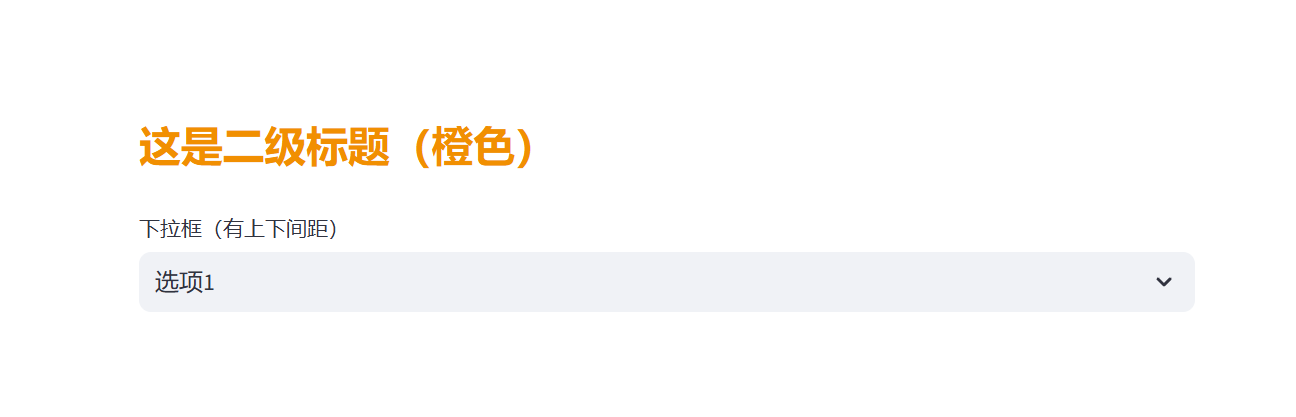
st.subheader("这是二级标题(橙色)")
st.selectbox("下拉框(有上下间距)", ["选项1", "选项2"])
效果如下
四、实例效果展示:美化销售数据应用
下面用一个完整实例,帮助直观感受 CSS 的作用。
- 需求
搭建一个 “销售数据展示应用”
包含:居中标题、美化按钮(点击显示数据)、带样式的表格,突出品牌色(蓝色 + 粉色)。、 - 完整代码(含 CSS)
import streamlit as st
import pandas as pd
import numpy as np

# ---------------------- 1. 嵌入CSS样式 ----------------------
st.markdown("""
<style>
/* 标题样式 */
h1 {
    color: #2E86AB;
    text-align: center;
    font-family: '微软雅黑', sans-serif;
    margin: 20px 0 30px 0;
}

/* 按钮样式 */
.stButton > button {
    background-color: #A23B72;
    color: white;
    border: none;
    border-radius: 8px;
    padding: 10px 25px;
    font-size: 16px;
    margin: 0 auto; /* 按钮居中 */
    display: block; /* 块级元素,支持margin:auto */
}
.stButton > button:hover {
    background-color: #F18F01;
    transform: scale(1.05);
    transition: all 0.3s ease;
}

/* 表格样式 */
.stDataFrame {
    width: 90% !important;
    margin: 25px auto;
    border-radius: 8px; /* 表格圆角 */
    box-shadow: 0 2px 8px rgba(0,0,0,0.1); /* 轻微阴影 */
}
[data-testid="stDataFrameHeader"] {
    background-color: #2E86AB !important;
    border-top-left-radius: 8px !important;
    border-top-right-radius: 8px !important;
}
[data-testid="stDataFrameHeader"] th {
    color: white !important;
    font-size: 14px;
    padding: 12px !important;
}
[data-testid="stDataFrameRow"] td {
    padding: 10px !important;
    text-align: center;
}
[data-testid="stDataFrameRow"]:hover {
    background-color: #F8F9FA !important;
}
</style>
""", unsafe_allow_html=True)

# ---------------------- 2. 应用功能逻辑 ----------------------
st.title("2024年1月销售数据展示")

# 按钮控制数据显示
if st.button("点击查看销售数据"):
    # 生成模拟销售数据
    dates = pd.date_range(start="2024-01-01", end="2024-01-10", freq="D")
    sales_data = pd.DataFrame({
        "日期": dates.strftime("%Y-%m-%d"),
        "产品类别": np.random.choice(["电子产品", "服装", "食品", "家居"], size=10),
        "销售额(元)": np.random.randint(1500, 6000, size=10),
        "订单量": np.random.randint(15, 60, size=10)
    })
    # 展示表格(应用CSS样式)
    st.dataframe(sales_data, use_container_width=False)
效果如下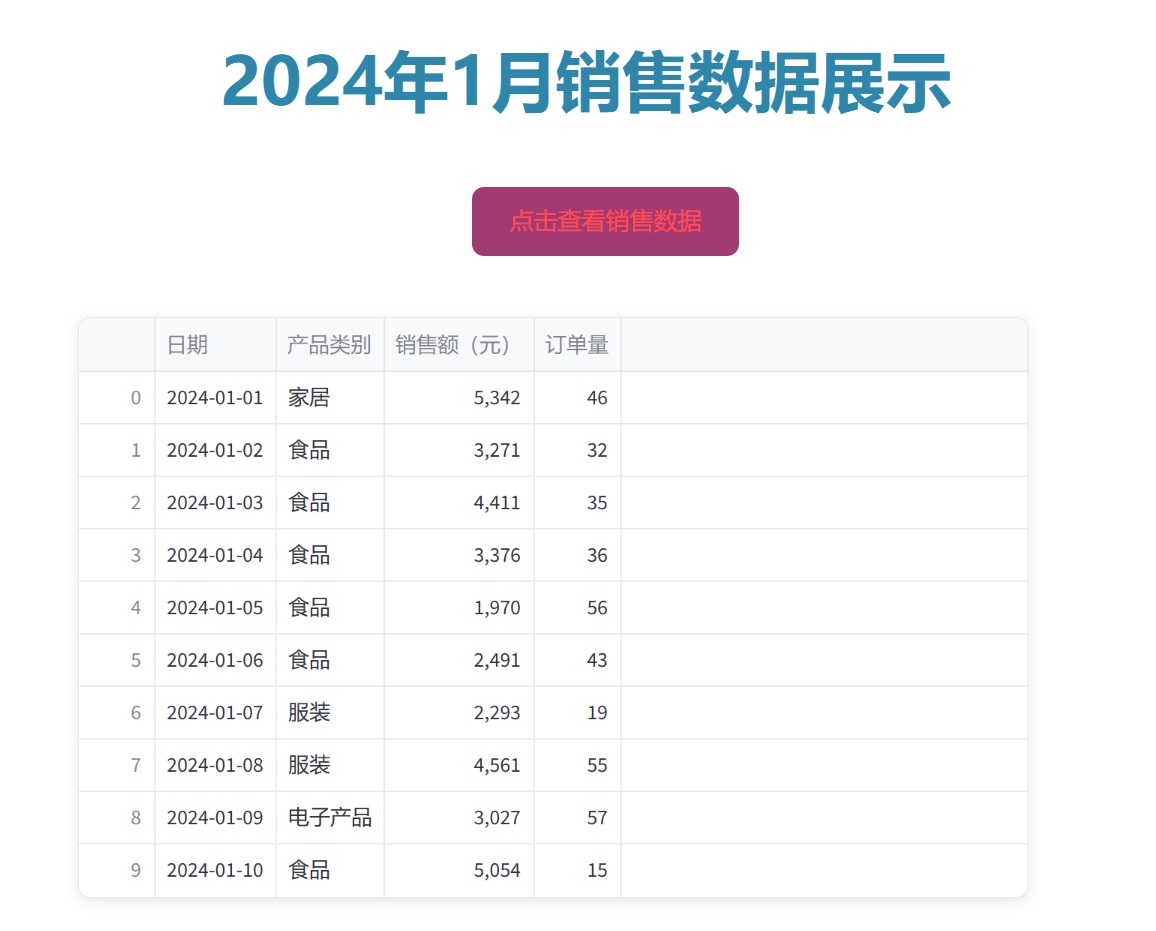
五、总结:Streamlit 中 CSS 的核心要点
核心价值:CSS 是 Streamlit 应用 “颜值提升” 的关键,解决默认样式单调问题,适配个性化需求(品牌色、重点突出、交互体验);
常用方法:
简单样式用st.markdown()(兼容所有版本)或st.html()(1.10 + 版本更简洁);
复杂样式用外部.css文件,便于维护和复用;
关键技巧:
通过 “浏览器检查” 获取 Streamlit 组件的类名(如stButton、stDataFrame),确保 CSS 选择器精准;
用!important强制覆盖 Streamlit 默认样式(如表格宽度);
适度添加过渡动画(如transition),提升交互体验但避免过度花哨;
注意事项:
unsafe_allow_html=True需谨慎使用,确保 CSS 代码安全(避免引入恶意脚本);
样式需适配不同屏幕(可添加响应式规则,如@media (max-width: 768px) { … })。
掌握 CSS 后,你可以进一步探索更复杂的美化:比如自定义侧边栏样式、添加数据卡片动画、实现暗黑模式等。下一篇博客我们可以聚焦 “Streamlit 自定义组件与 CSS 的深度结合”,如果你有具体的美化需求,也可以随时提出!
Streamlit:CSS——從基礎到實戰美化應用
介紹 Streamlit 中透過 st.markdown、st.html 與外部 CSS 自訂標題、按鈕、表格樣式,並完成品牌化銷售資料展示範例。
來源:https://blog.csdn.net/2403_87969572/article/details/152464252
抓取時間(ISO本地):2026-05-18 05:17:03
文章目錄
一、前言
在上一篇博客中,我們已經學會用 Streamlit 快速搭建數據應用:從st.title()設置標題、st.dataframe()展示數據,到st.button()實現交互,短短几行代碼就能跑通核心功能。但實際項目中,默認的 “灰白底色、簡單按鈕、左對齊標題” 往往不夠美觀
比如企業應用需要匹配品牌色,個人項目想突出重點數據,這時候CSS(層疊樣式表)就成了關鍵工具:它能突破 Streamlit 默認樣式限制,自定義組件外觀、佈局甚至交互效果,讓應用從 “能用” 升級為 “好用又好看”。
二、CSS 是什麼
先明確基礎概念:CSS 本身是用於描述網頁元素樣式的語言(如顏色、字體、間距),而在 Streamlit 中,CSS 的核心作用是 “修改 Streamlit 生成的網頁組件樣式”—— 因為 Streamlit 本質是將 Python 代碼轉化為網頁,其組件(按鈕、表格、標題等)都會對應網頁中的 HTML 標籤和類名(如按鈕對應標籤,類名為stButton),我們通過 CSS 選擇器定位這些組件,再定義樣式規則即可實現自定義。
簡單說:Streamlit 負責 “搭骨架”(功能),CSS 負責 “穿衣服”(美化)。
三、Streamlit 中 CSS 的 3 種核心用法
Streamlit 沒有專門的 “CSS 接口”,但提供了兩種嵌入 CSS 的常用方式,結合基礎選擇器就能滿足大部分需求。以下是實操方法(附代碼示例):
方法 1:用st.markdown()嵌入 CSS(兼容所有版本)
Streamlit 的st.markdown()支持渲染 HTML,只需添加unsafe_allow_html=True參數,就能嵌入
import streamlit as st
# 嵌入CSS:用<style>標籤包裹,通過類名定位Streamlit組件
st.markdown("""
<style>
/* 1. 自定義標題樣式(定位<h1>標籤) */
h1 {
    color: #2E86AB; /* 品牌藍色 */
    text-align: center; /* 居中對齊 */
    font-family: '微軟雅黑', sans-serif; /* 字體 */
    margin-bottom: 30px; /* 底部間距 */
}

/* 2. 自定義按鈕樣式(定位Streamlit按鈕類名.stButton) */
.stButton > button {
    background-color: #A23B72; /* 按鈕底色:粉色 */
    color: white; /* 文字白色 */
    border: none; /* 取消邊框 */
    border-radius: 8px; /* 圓角 */
    padding: 10px 20px; /* 內邊距:上下10px,左右20px */
    font-size: 16px; /* 字體大小 */
}

/* 3. 按鈕hover效果(鼠標懸浮時) */
.stButton > button:hover {
    background-color: #F18F01; /* 底色變橙色 */
    transform: scale(1.05); /* 輕微放大(1.05倍) */
    transition: all 0.3s ease; /* 過渡動畫:0.3秒生效 */
}
</style>
""", unsafe_allow_html=True)

# 測試樣式:標題和按鈕
st.title("這是CSS美化後的標題")
st.button("點擊測試美化按鈕")
效果如下:
關鍵說明:
需用 style 標籤包裹 CSS 代碼,且必須加unsafe_allow_html=True(Streamlit 默認禁止 HTML,開啟後需確保 CSS 來源安全);
Streamlit 組件的類名可通過 “瀏覽器檢查” 獲取(右鍵組件→“檢查”,查看 HTML 標籤的class屬性)。具體圖示方法如下:
方法 2:用st.html()嵌入 CSS(Streamlit 1.10 + 版本)
Streamlit 1.10 版本後新增了st.html()組件,專門用於渲染 HTML/CSS,無需寫unsafe_allow_html=True,代碼更簡潔。
示例:修改數據表格樣式
import streamlit as st
import pandas as pd
import numpy as np

# 用st.html()嵌入CSS:更簡潔,無需額外參數
st.html("""
<style>
/* 1. 自定義表格容器樣式(定位.stDataFrame) */
.stDataFrame {
    width: 90% !important; /* 表格寬度90%(!important強制覆蓋默認) */
    margin: 20px auto; /* 上下間距20px,左右自動(實現居中) */
}

/* 2. 表格表頭樣式(定位表頭類名) */
[data-testid="stDataFrameHeader"] {
    background-color: #2E86AB !important; /* 表頭底色藍色 */
}
[data-testid="stDataFrameHeader"] th {
    color: white !important; /* 表頭文字白色 */
    font-weight: bold !important; /* 文字加粗 */
}

/* 3. 表格行hover效果(鼠標懸浮行) */
[data-testid="stDataFrameRow"]:hover {
    background-color: #F8F9FA !important; /* 行底色變淺灰 */
}
</style>
""")

# 生成測試數據並展示表格(測試樣式)
data = pd.DataFrame({
    "產品": ["手機", "電腦", "平板"],
    "銷量": np.random.randint(1000, 5000, 3),
    "利潤": np.random.randint(200, 1000, 3)
})
st.dataframe(data)
效果如下
方法 3:外部 CSS 文件(適合複雜樣式)
如果 CSS 規則較多(如多個頁面共用樣式),可單獨創建.css文件,再用st.markdown()讀取並嵌入。
步驟:
創建style.css文件,寫入樣式:
/* style.css */
h3 { color: #F18F01; } /* 對應 st.subheader() */
h2 { color: #F18F01; } /* 對應 st.header() */
.stSelectbox { margin: 10px 0; }
在 Streamlit 代碼中讀取文件:
import streamlit as st

# 讀取外部CSS文件
with open("style.css", "r") as f:
    css = f.read()

# 嵌入CSS
st.markdown(f"<style>{css}</style>", unsafe_allow_html=True)

# 測試樣式
st.subheader("這是二級標題(橙色)")
st.selectbox("下拉框(有上下間距)", ["選項1", "選項2"])
效果如下
四、實例效果展示:美化銷售數據應用
下面用一個完整實例,幫助直觀感受 CSS 的作用。
- 需求
搭建一個 “銷售數據展示應用”
包含:居中標題、美化按鈕(點擊顯示數據)、帶樣式的表格,突出品牌色(藍色 + 粉色)。、 - 完整代碼(含 CSS)
import streamlit as st
import pandas as pd
import numpy as np

# ---------------------- 1. 嵌入CSS樣式 ----------------------
st.markdown("""
<style>
/* 標題樣式 */
h1 {
    color: #2E86AB;
    text-align: center;
    font-family: '微軟雅黑', sans-serif;
    margin: 20px 0 30px 0;
}

/* 按鈕樣式 */
.stButton > button {
    background-color: #A23B72;
    color: white;
    border: none;
    border-radius: 8px;
    padding: 10px 25px;
    font-size: 16px;
    margin: 0 auto; /* 按鈕居中 */
    display: block; /* 塊級元素,支持margin:auto */
}
.stButton > button:hover {
    background-color: #F18F01;
    transform: scale(1.05);
    transition: all 0.3s ease;
}

/* 表格樣式 */
.stDataFrame {
    width: 90% !important;
    margin: 25px auto;
    border-radius: 8px; /* 表格圓角 */
    box-shadow: 0 2px 8px rgba(0,0,0,0.1); /* 輕微陰影 */
}
[data-testid="stDataFrameHeader"] {
    background-color: #2E86AB !important;
    border-top-left-radius: 8px !important;
    border-top-right-radius: 8px !important;
}
[data-testid="stDataFrameHeader"] th {
    color: white !important;
    font-size: 14px;
    padding: 12px !important;
}
[data-testid="stDataFrameRow"] td {
    padding: 10px !important;
    text-align: center;
}
[data-testid="stDataFrameRow"]:hover {
    background-color: #F8F9FA !important;
}
</style>
""", unsafe_allow_html=True)

# ---------------------- 2. 應用功能邏輯 ----------------------
st.title("2024年1月銷售數據展示")

# 按鈕控制數據顯示
if st.button("點擊查看銷售數據"):
    # 生成模擬銷售數據
    dates = pd.date_range(start="2024-01-01", end="2024-01-10", freq="D")
    sales_data = pd.DataFrame({
        "日期": dates.strftime("%Y-%m-%d"),
        "產品類別": np.random.choice(["電子產品", "服裝", "食品", "家居"], size=10),
        "銷售額(元)": np.random.randint(1500, 6000, size=10),
        "訂單量": np.random.randint(15, 60, size=10)
    })
    # 展示表格(應用CSS樣式)
    st.dataframe(sales_data, use_container_width=False)
效果如下
五、總結:Streamlit 中 CSS 的核心要點
核心價值:CSS 是 Streamlit 應用 “顏值提升” 的關鍵,解決默認樣式單調問題,適配個性化需求(品牌色、重點突出、交互體驗);
常用方法:
簡單樣式用st.markdown()(兼容所有版本)或st.html()(1.10 + 版本更簡潔);
複雜樣式用外部.css文件,便於維護和複用;
關鍵技巧:
通過 “瀏覽器檢查” 獲取 Streamlit 組件的類名(如stButton、stDataFrame),確保 CSS 選擇器精準;
用!important強制覆蓋 Streamlit 默認樣式(如表格寬度);
適度添加過渡動畫(如transition),提升交互體驗但避免過度花哨;
注意事項:
unsafe_allow_html=True需謹慎使用,確保 CSS 代碼安全(避免引入惡意腳本);
樣式需適配不同屏幕(可添加響應式規則,如@media (max-width: 768px) { … })。
掌握 CSS 後,你可以進一步探索更復雜的美化:比如自定義側邊欄樣式、添加數據卡片動畫、實現暗黑模式等。下一篇博客我們可以聚焦 “Streamlit 自定義組件與 CSS 的深度結合”,如果你有具體的美化需求,也可以隨時提出!
Streamlit & CSS — From Basics to Polishing Real Apps
Customize Streamlit UI with st.markdown, st.html, and external CSS for titles, buttons, tables, plus a styled sales dashboard demo.
Captured at (local ISO): 2026-05-18 05:17:03
I. Preface
In the last post we used Streamlit to ship apps fast—st.title(), st.dataframe(), st.button(), just a few lines for the core loop. In real projects the stock gray layout often isn’t polished enough.
Brand colors for enterprise demos, emphasis for KPIs—CSS is how you break past defaults: retarget Streamlit’s HTML output, tune layout, even micro-interactions, and move from “works” to “works and looks intentional.”
II. What CSS is
CSS describes presentation—colors, fonts, spacing. In Streamlit, CSS styles the HTML Streamlit emits: buttons, tables, titles map to tags and classes (e.g., buttons → .stButton). Select those nodes, declare rules, and the app updates visually.
Streamlit builds the skeleton; CSS is the skin.
III. Three core ways to use CSS in Streamlit
There is no dedicated “CSS API,” but you can inject styles with st.markdown(..., unsafe_allow_html=True) or st.html(). Examples below.
Method 1: embed CSS with st.markdown() (all versions)
st.markdown can render HTML; with unsafe_allow_html=True, wrap rules in <style>:
import streamlit as st
# 嵌入CSS:用<style>标签包裹,通过类名定位Streamlit组件
st.markdown("""
<style>
/* 1. 自定义标题样式(定位<h1>标签) */
h1 {
    color: #2E86AB; /* 品牌蓝色 */
    text-align: center; /* 居中对齐 */
    font-family: '微软雅黑', sans-serif; /* 字体 */
    margin-bottom: 30px; /* 底部间距 */
}

/* 2. 自定义按钮样式(定位Streamlit按钮类名.stButton) */
.stButton > button {
    background-color: #A23B72; /* 按钮底色:粉色 */
    color: white; /* 文字白色 */
    border: none; /* 取消边框 */
    border-radius: 8px; /* 圆角 */
    padding: 10px 20px; /* 内边距:上下10px,左右20px */
    font-size: 16px; /* 字体大小 */
}

/* 3. 按钮hover效果(鼠标悬浮时) */
.stButton > button:hover {
    background-color: #F18F01; /* 底色变橙色 */
    transform: scale(1.05); /* 轻微放大(1.05倍) */
    transition: all 0.3s ease; /* 过渡动画:0.3秒生效 */
}
</style>
""", unsafe_allow_html=True)

# 测试样式:标题和按钮
st.title("这是CSS美化后的标题")
st.button("点击测试美化按钮")
Result:
Notes:
Wrap CSS in <style> and always pass unsafe_allow_html=True (Streamlit blocks HTML by default—only inject trusted CSS).
Discover class names via Inspect in the browser (right-click → Inspect → class on the node). Illustrated:
Method 2: embed CSS with st.html() (Streamlit 1.10+)
From 1.10 onward, st.html() renders HTML/CSS without unsafe_allow_html. Example—styled dataframe:
import streamlit as st
import pandas as pd
import numpy as np

# 用st.html()嵌入CSS:更简洁,无需额外参数
st.html("""
<style>
/* 1. 自定义表格容器样式(定位.stDataFrame) */
.stDataFrame {
    width: 90% !important; /* 表格宽度90%(!important强制覆盖默认) */
    margin: 20px auto; /* 上下间距20px,左右自动(实现居中) */
}

/* 2. 表格表头样式(定位表头类名) */
[data-testid="stDataFrameHeader"] {
    background-color: #2E86AB !important; /* 表头底色蓝色 */
}
[data-testid="stDataFrameHeader"] th {
    color: white !important; /* 表头文字白色 */
    font-weight: bold !important; /* 文字加粗 */
}

/* 3. 表格行hover效果(鼠标悬浮行) */
[data-testid="stDataFrameRow"]:hover {
    background-color: #F8F9FA !important; /* 行底色变浅灰 */
}
</style>
""")

# 生成测试数据并展示表格(测试样式)
data = pd.DataFrame({
    "产品": ["手机", "电脑", "平板"],
    "销量": np.random.randint(1000, 5000, 3),
    "利润": np.random.randint(200, 1000, 3)
})
st.dataframe(data)
Result:
Method 3: external CSS file (bigger stylesheets)
For many rules—or shared themes—use a .css file and inject via st.markdown.
style.css:
/* style.css */
h3 { color: #F18F01; } /* 对应 st.subheader() */
h2 { color: #F18F01; } /* 对应 st.header() */
.stSelectbox { margin: 10px 0; }
App code:
import streamlit as st

# 读取外部CSS文件
with open("style.css", "r") as f:
    css = f.read()

# 嵌入CSS
st.markdown(f"<style>{css}</style>", unsafe_allow_html=True)

# 测试样式
st.subheader("这是二级标题(橙色)")
st.selectbox("下拉框(有上下间距)", ["选项1", "选项2"])
Result:
IV. Demo: a styled sales dashboard
Goal: a small sales KPI view—centered title, branded button that reveals data, styled table (blue + pink accents).
Full sample:
import streamlit as st
import pandas as pd
import numpy as np

# ---------------------- 1. 嵌入CSS样式 ----------------------
st.markdown("""
<style>
/* 标题样式 */
h1 {
    color: #2E86AB;
    text-align: center;
    font-family: '微软雅黑', sans-serif;
    margin: 20px 0 30px 0;
}

/* 按钮样式 */
.stButton > button {
    background-color: #A23B72;
    color: white;
    border: none;
    border-radius: 8px;
    padding: 10px 25px;
    font-size: 16px;
    margin: 0 auto; /* 按钮居中 */
    display: block; /* 块级元素,支持margin:auto */
}
.stButton > button:hover {
    background-color: #F18F01;
    transform: scale(1.05);
    transition: all 0.3s ease;
}

/* 表格样式 */
.stDataFrame {
    width: 90% !important;
    margin: 25px auto;
    border-radius: 8px; /* 表格圆角 */
    box-shadow: 0 2px 8px rgba(0,0,0,0.1); /* 轻微阴影 */
}
[data-testid="stDataFrameHeader"] {
    background-color: #2E86AB !important;
    border-top-left-radius: 8px !important;
    border-top-right-radius: 8px !important;
}
[data-testid="stDataFrameHeader"] th {
    color: white !important;
    font-size: 14px;
    padding: 12px !important;
}
[data-testid="stDataFrameRow"] td {
    padding: 10px !important;
    text-align: center;
}
[data-testid="stDataFrameRow"]:hover {
    background-color: #F8F9FA !important;
}
</style>
""", unsafe_allow_html=True)

# ---------------------- 2. 应用功能逻辑 ----------------------
st.title("2024年1月销售数据展示")

# 按钮控制数据显示
if st.button("点击查看销售数据"):
    # 生成模拟销售数据
    dates = pd.date_range(start="2024-01-01", end="2024-01-10", freq="D")
    sales_data = pd.DataFrame({
        "日期": dates.strftime("%Y-%m-%d"),
        "产品类别": np.random.choice(["电子产品", "服装", "食品", "家居"], size=10),
        "销售额(元)": np.random.randint(1500, 6000, size=10),
        "订单量": np.random.randint(15, 60, size=10)
    })
    # 展示表格(应用CSS样式)
    st.dataframe(sales_data, use_container_width=False)
Result:
V. Summary: CSS essentials in Streamlit
Why CSS matters: it’s the fastest path from default gray to on-brand, scannable layouts—color systems, emphasis, and nicer interactions.
Patterns:
• Simple tweaks → st.markdown (works everywhere) or st.html (1.10+, cleaner).
• Big themes → external .css for reuse and review.
Technique:
• Inspect real class names (.stButton, dataframe test ids) so selectors hit the right nodes.
• Use !important sparingly but effectively vs. Streamlit defaults (e.g., table width).
• transition for micro-interaction—don’t overanimate.
Safety & layout:
• unsafe_allow_html=True only for trusted CSS—no untrusted paste-ins.
• Consider @media (max-width: 768px) for responsive tightening.
Once CSS clicks, you can push further—sidebar theming, animated metric cards, dark mode. A follow-up could dive custom components × CSS; ping if you want a specific look mocked up.