Python :pip 下载太慢?教你 2 步配置国内镜像源,速度从 KB/s 到 MB
如果你经常用 Python,肯定遇到过这样的场景:想安装一个第三方库,比如requests或pandas,在命令行敲下pip install requests后,进度条半天不动,要么卡在 “Collecting requests”,要么弹出 “ReadTimeoutError”—— 这不是你的网络差,而是 pip 默认的软件源在国外服务器(https: //pypi.org/simple/),考虑到限制,速度自然慢得让人着急。 其实解决办法很简单:把 pip 的下载源换成国内镜像源(国内服务器复制了国外源的所有内容,就近访问速度拉满) 今天这篇文章,从基础概念到实操步骤,手把手教你搞定 pip 镜像源配置。
前言
如果你经常用 Python,肯定遇到过这样的场景:想安装一个第三方库,比如requests或pandas,在命令行敲下pip install requests后,进度条半天不动,要么卡在 “Collecting requests”,要么弹出 “ReadTimeoutError”—— 这不是你的网络差,而是 pip 默认的软件源在国外服务器(https://pypi.org/simple/),考虑到限制,速度自然慢得让人着急。
其实解决办法很简单:把 pip 的下载源换成国内镜像源(国内服务器复制了国外源的所有内容,就近访问速度拉满)
今天这篇文章,从基础概念到实操步骤,手把手教你搞定 pip 镜像源配置。
一、pip 是什么?
pip 是 Python 官方自带的包管理工具,可以理解为手机里的 “应用商店”—— 用它来安装第三方库(比如做数据分析的numpy、做爬虫的scrapy)、卸载用不上的库、更新旧版本库,甚至查看已安装的库列表。
它的核心问题在于:默认连接的是国外的 PyPI 官方源。由于网络链路长、带宽限制,国内用户用默认源下载时,速度经常只有几十 KB/s,稍大一点的库(比如tensorflow)还会直接超时失败。这也是我们需要配置镜像源的根本原因。
二、镜像源
1、什么是镜像源
“镜像源” 可以理解为 “副本服务器”—— 国内的科技公司(比如阿里、清华乃至一些高校)会定期同步国外 PyPI 源的所有内容,把这些库文件存到自己的国内服务器上。当你用国内镜像源下载时,可以直接从从 对应的服务器下载文件,速度自然比PyPI官方源快 很多
2、主流的镜像源有哪些
这边推荐一些主流的镜像源,也可以直接访问其对应网址可以清楚其架构
三、配置镜像源
1、临时配置
如果只是偶尔安装一个库,不想修改全局配置,用 “临时设置” 最方便 —— 在pip install命令后加-i参数,指定本次用哪个镜像源。
比如我想安装requests库,用清华镜像源临时下载:
pip install requests -i https://pypi.tuna.tsinghua.edu.cn/simple/
再比如安装指定版本的numpy(1.24.3 版本),用阿里云源:
pip install numpy==1.24.3 -i https://mirrors.aliyun.com/pypi/simple/
2、永久设置
方式 1:命令行修改
1:执行配置命令
这种方式通过pip config命令直接修改全局配置,无需找文件,适合所有系统(Windows、macOS、Linux 通用)。
打开命令行(Windows 用 “命令提示符” 或 PowerShell,mac/Linux 用终端),输入以下命令(以清华源为例):
pip config set global.index-url https://pypi.tuna.tsinghua.edu.cn/simple/
2:添加信任(可选,避免警告)
部分镜像源会弹出 “不信任” 警告,只需再执行一条命令,把镜像源加入信任列表:
pip config set global.trusted-host pypi.tuna.tsinghua.edu.cn
(说明:trusted-host后面的内容,是镜像源地址去掉 “https://” 和 “/simple/” 后的域名)
3:验证是否生效
执行以下命令查看当前 pip 配置:
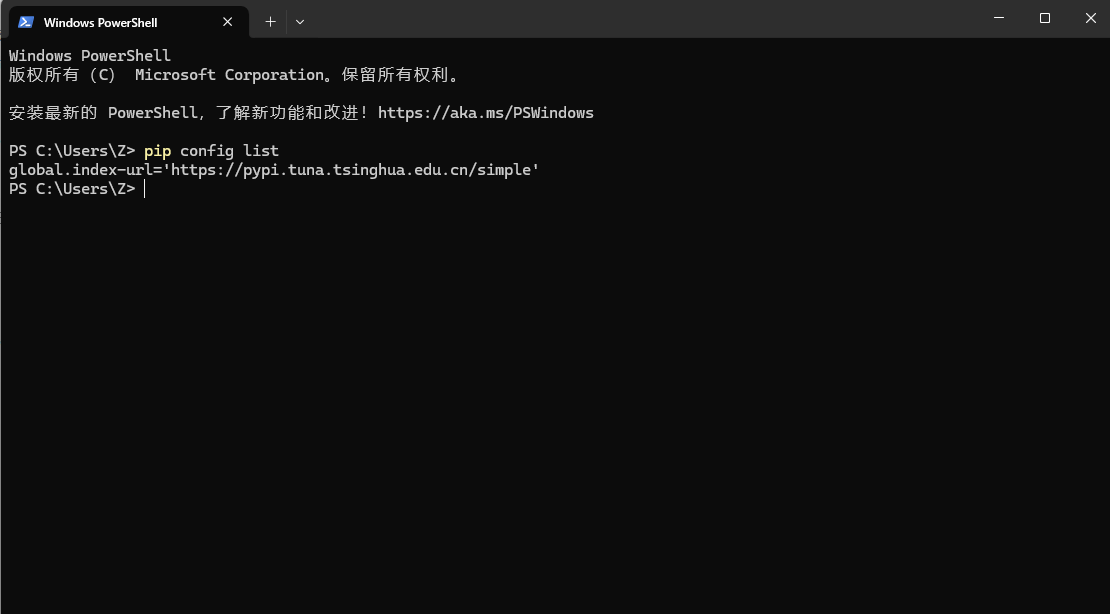
pip config list
如果输出内容中含有自己刚才配置的镜像源,那么就说明配置成功
方式 2:手动修改配置文件(自定义场景)
如果命令行修改失败(比如权限问题),或需要配置多个镜像源(比如主源 + 备用源),可以手动创建 / 编辑 pip 的配置文件。
不同系统的配置文件路径不同,下面分系统说明:
1.Windows 系统(以 Win10/11 为例)
步骤 1:找到配置文件路径
默认路径:C:\Users\你的用户名\pip\pip.ini
如果找不到pip文件夹或pip.ini文件,直接手动创建:
在C:\Users\你的用户名\目录下,新建文件夹,命名为pip;
在pip文件夹里,新建 “文本文档”,重命名为pip.ini(注意:后缀是.ini,不是.txt)。
步骤 2:编辑配置内容
用记事本或 Notepad++ 打开pip.ini,粘贴以下内容(以清华源为例):
ini
[global]
index-url = https://pypi.tuna.tsinghua.edu.cn/simple/
trusted-host = pypi.tuna.tsinghua.edu.cn
# 可选:添加备用源(如果主源不可用,自动用备用源)
# extra-index-url = https://mirrors.aliyun.com/pypi/simple/
2. macOS/Linux 系统
步骤 1:找到配置文件路径
默认路径:/.config/pip/pip.conf(代表用户主目录)
macOS 用户:主目录是/Users/你的用户名/;
Linux 用户:主目录是/home/你的用户名/。
如果找不到路径,手动创建:
打开终端,执行命令创建文件夹:mkdir -p ~/.config/pip;
在该文件夹下,创建pip.conf文件:touch ~/.config/pip/pip.conf。
步骤 2:编辑配置内容
用 vim 或文本编辑器打开pip.conf,粘贴以下内容(以阿里云源为例):
conf
[global]
index-url = https://mirrors.aliyun.com/pypi/simple/
trusted-host = mirrors.aliyun.com
# 可选:设置超时时间(避免慢网超时,单位:秒)
timeout = 120
步骤 3:验证生效
终端执行
pip config list
如果输出配置内容,说明成功。
四、总结
应该选择哪种方法
临时设置:适合偶尔安装 1-2 个库,不想改全局配置;
命令行永久设置:适合新手,30 秒搞定,无需找文件;
手动永久设置:适合需要自定义配置(如备用源、超时时间)的进阶用户。
如果某个镜像源突然变慢或失效,直接换其他推荐的源即可
Python :pip 下載太慢?教你 2 步配置國內鏡像源,速度從 KB/s 到 MB
如果你經常用 Python,肯定遇到過這樣的場景:想安裝一個第三方庫,比如requests或pandas,在命令行敲下pip install requests後,進度條半天不動,要麼卡在 “Collecting requests”,要麼彈出 “ReadTimeoutError”—— 這不是你的網絡差,而是 pip 默認的軟件源在國外服務器(https: //pypi.org/simple/),考慮到限制,速度自然慢得讓人著急。 其實解決辦法很簡單:把 pip 的下載源換成國內鏡像源(國內服務器複製了國外源的所有內容,就近訪問速度拉滿) 今天這篇文章,從基礎概念到實操步驟,手把手教你搞定 pip 鏡像源配置。
來源:https://blog.csdn.net/2403_87969572/article/details/151935542
抓取時間(ISO本地):2026-05-18 05:16:58
文章目錄
前言
如果你經常用 Python,肯定遇到過這樣的場景:想安裝一個第三方庫,比如requests或pandas,在命令行敲下pip install requests後,進度條半天不動,要麼卡在 “Collecting requests”,要麼彈出 “ReadTimeoutError”—— 這不是你的網絡差,而是 pip 默認的軟件源在國外服務器(https://pypi.org/simple/),考慮到限制,速度自然慢得讓人著急。
其實解決辦法很簡單:把 pip 的下載源換成國內鏡像源(國內服務器複製了國外源的所有內容,就近訪問速度拉滿)
今天這篇文章,從基礎概念到實操步驟,手把手教你搞定 pip 鏡像源配置。
一、pip 是什麼?
pip 是 Python 官方自帶的包管理工具,可以理解為手機裡的 “應用商店”—— 用它來安裝第三方庫(比如做數據分析的numpy、做爬蟲的scrapy)、卸載用不上的庫、更新舊版本庫,甚至查看已安裝的庫列表。
它的核心問題在於:默認連接的是國外的 PyPI 官方源。由於網絡鏈路長、帶寬限制,國內用戶用默認源下載時,速度經常只有幾十 KB/s,稍大一點的庫(比如tensorflow)還會直接超時失敗。這也是我們需要配置鏡像源的根本原因。
二、鏡像源
1、什麼是鏡像源
“鏡像源” 可以理解為 “副本服務器”—— 國內的科技公司(比如阿里、清華乃至一些高校)會定期同步國外 PyPI 源的所有內容,把這些庫文件存到自己的國內服務器上。當你用國內鏡像源下載時,可以直接從從 對應的服務器下載文件,速度自然比PyPI官方源快 很多
2、主流的鏡像源有哪些
這邊推薦一些主流的鏡像源,也可以直接訪問其對應網址可以清楚其架構
三、配置鏡像源
1、臨時配置
如果只是偶爾安裝一個庫,不想修改全局配置,用 “臨時設置” 最方便 —— 在pip install命令後加-i參數,指定本次用哪個鏡像源。
比如我想安裝requests庫,用清華鏡像源臨時下載:
pip install requests -i https://pypi.tuna.tsinghua.edu.cn/simple/
再比如安裝指定版本的numpy(1.24.3 版本),用阿里雲源:
pip install numpy==1.24.3 -i https://mirrors.aliyun.com/pypi/simple/
2、永久設置
方式 1:命令行修改
1:執行配置命令
這種方式通過pip config命令直接修改全局配置,無需找文件,適合所有系統(Windows、macOS、Linux 通用)。
打開命令行(Windows 用 “命令提示符” 或 PowerShell,mac/Linux 用終端),輸入以下命令(以清華源為例):
pip config set global.index-url https://pypi.tuna.tsinghua.edu.cn/simple/
2:添加信任(可選,避免警告)
部分鏡像源會彈出 “不信任” 警告,只需再執行一條命令,把鏡像源加入信任列表:
pip config set global.trusted-host pypi.tuna.tsinghua.edu.cn
(說明:trusted-host後面的內容,是鏡像源地址去掉 “https://” 和 “/simple/” 後的域名)
3:驗證是否生效
執行以下命令查看當前 pip 配置:
pip config list
如果輸出內容中含有自己剛才配置的鏡像源,那麼就說明配置成功
方式 2:手動修改配置文件(自定義場景)
如果命令行修改失敗(比如權限問題),或需要配置多個鏡像源(比如主源 + 備用源),可以手動創建 / 編輯 pip 的配置文件。
不同系統的配置文件路徑不同,下面分系統說明:
1.Windows 系統(以 Win10/11 為例)
步驟 1:找到配置文件路徑
默認路徑:C:\Users\你的用戶名\pip\pip.ini
如果找不到pip文件夾或pip.ini文件,直接手動創建:
在C:\Users\你的用戶名\目錄下,新建文件夾,命名為pip;
在pip文件夾裡,新建 “文本文檔”,重命名為pip.ini(注意:後綴是.ini,不是.txt)。
步驟 2:編輯配置內容
用記事本或 Notepad++ 打開pip.ini,粘貼以下內容(以清華源為例):
ini
[global]
index-url = https://pypi.tuna.tsinghua.edu.cn/simple/
trusted-host = pypi.tuna.tsinghua.edu.cn
# 可選:添加備用源(如果主源不可用,自動用備用源)
# extra-index-url = https://mirrors.aliyun.com/pypi/simple/
2. macOS/Linux 系統
步驟 1:找到配置文件路徑
默認路徑:/.config/pip/pip.conf(代表用戶主目錄)
macOS 用戶:主目錄是/Users/你的用戶名/;
Linux 用戶:主目錄是/home/你的用戶名/。
如果找不到路徑,手動創建:
打開終端,執行命令創建文件夾:mkdir -p ~/.config/pip;
在該文件夾下,創建pip.conf文件:touch ~/.config/pip/pip.conf。
步驟 2:編輯配置內容
用 vim 或文本編輯器打開pip.conf,粘貼以下內容(以阿里雲源為例):
conf
[global]
index-url = https://mirrors.aliyun.com/pypi/simple/
trusted-host = mirrors.aliyun.com
# 可選:設置超時時間(避免慢網超時,單位:秒)
timeout = 120
步驟 3:驗證生效
終端執行
pip config list
如果輸出配置內容,說明成功。
四、總結
應該選擇哪種方法
臨時設置:適合偶爾安裝 1-2 個庫,不想改全局配置;
命令行永久設置:適合新手,30 秒搞定,無需找文件;
手動永久設置:適合需要自定義配置(如備用源、超時時間)的進階用戶。
如果某個鏡像源突然變慢或失效,直接換其他推薦的源即可
Python: Is pip too slow? Configure a China mirror in two steps—from KB/s to MB/s
Tsinghua University;https: //pypi.cn/simple/;Alibaba Cloud;https://mirrors.com/pypi/simple/;Douban;https://pypi.com/simple/
Captured at (local ISO): 2026-05-18 05:16:58
Preface
If you use Python often, you have probably seen this: you want to install a third‑party package such as requests or pandas, you run pip install requests in the terminal, and the progress bar barely moves—it either hangs on “Collecting requests” or throws ReadTimeoutError. That is not necessarily because your network is bad; pip’s default index is on overseas servers (https://pypi.org/simple/). With routing and bandwidth limits, speeds are naturally frustrating.
The fix is simple: point pip at a domestic mirror (a local server that replicates the foreign index so you download from a nearby node). This article walks you from the basics to hands‑on steps so you can configure pip mirrors with confidence.
1. What is pip?
pip is Python’s official package manager. Think of it as an “app store” for libraries: install third‑party packages (e.g. numpy for data analysis, scrapy for crawling), uninstall what you do not need, upgrade old versions, or list what is installed.
The catch: by default it talks to the global PyPI index abroad. Long paths and limited bandwidth often mean tens of KB/s in China, and larger packages (e.g. TensorFlow) may time out. That is why mirror configuration matters.
2. Mirror sites
2.1 What is a mirror site?
A mirror is a replica: companies and schools periodically sync everything from PyPI to servers in China. When you install via a mirror, files are fetched from those nearby hosts, which is usually much faster than the official PyPI host.
2.2 Mainstream mirror sites
Below are common mirrors; you can also visit their URLs to see how they are organized.
| Mirror | URL |
|---|---|
| Tsinghua University | https://pypi.tuna.tsinghua.edu.cn/simple/ |
| Alibaba Cloud | https://mirrors.aliyun.com/pypi/simple/ |
| Douban | https://pypi.doubanio.com/simple/ |
| University of Science and Technology of China | https://pypi.mirrors.ustc.edu.cn/simple/ |
| Huawei Cloud | https://mirrors.huaweicloud.com/repository/pypi/simple/ |
| Nanjing University | https://mirrors.nju.edu.cn/simple/ |
3. Configure a mirror
3.1 Temporary configuration
If you only need a one‑off install and do not want to change global settings, add -i to pip install to pick a mirror for that command only.
Install requests using the Tsinghua mirror:
pip install requests -i https://pypi.tuna.tsinghua.edu.cn/simple/
Install a specific NumPy version (1.24.3) using the Alibaba mirror:
pip install numpy==1.24.3 -i https://mirrors.aliyun.com/pypi/simple/
3.2 Permanent configuration
Option 1: Command line
Step 1: set the global index
pip config edits the global config directly—no need to hunt for files; works on Windows, macOS, and Linux.
Open a terminal (Command Prompt or PowerShell on Windows; Terminal on macOS/Linux) and run (Tsinghua example):
pip config set global.index-url https://pypi.tuna.tsinghua.edu.cn/simple/
Step 2: trusted host (optional, reduces warnings)
Some mirrors trigger “untrusted host” warnings. Add the host to the trust list:
pip config set global.trusted-host pypi.tuna.tsinghua.edu.cn
(The value after trusted-host is the mirror’s domain—strip https:// and /simple/.)
Step 3: verify
List current pip configuration:
pip config list
If the output includes your mirror URL, the change took effect.
Option 2: Edit the config file manually (custom scenarios)
If CLI configuration fails (e.g. permissions) or you need multiple mirrors (primary + fallback), create or edit pip’s config file manually. Paths differ by OS.
1. Windows (Win10/11)
Step 1: locate the file
Default: C:\Users\<YourUsername>\pip\pip.ini
If the pip folder or pip.ini is missing, create it:
Under C:\Users\<YourUsername>\, create folder pip;
Inside pip, create a new text file and rename it to pip.ini (extension .ini, not .txt).
Step 2: edit contents
Open pip.ini in Notepad or Notepad++ and paste (Tsinghua example):
[global]
index-url = https://pypi.tuna.tsinghua.edu.cn/simple/
trusted-host = pypi.tuna.tsinghua.edu.cn
# Optional: fallback index if the primary is down
# extra-index-url = https://mirrors.aliyun.com/pypi/simple/
2. macOS / Linux
Step 1: locate the file
Default: ~/.config/pip/pip.conf (~ is your home directory).
macOS: /Users/<YourUsername>/
Linux: /home/<YourUsername>/
Create if missing:
mkdir -p ~/.config/pip
touch ~/.config/pip/pip.conf
Step 2: edit contents
Open pip.conf with vim or any editor and paste (Alibaba example):
[global]
index-url = https://mirrors.aliyun.com/pypi/simple/
trusted-host = mirrors.aliyun.com
# Optional: timeout in seconds for slow networks
timeout = 120
Step 3: verify
Run:
pip config list
If you see the settings, it worked.
4. Summary
Which method to use:
- Temporary
-i: occasional installs; no global change. - Permanent via CLI: fastest for beginners; no file hunting.
- Permanent via config file: advanced customization (fallback URLs, timeouts).
If a mirror slows down or goes away, switch to another from the table above.